Table of Contents
Introduction
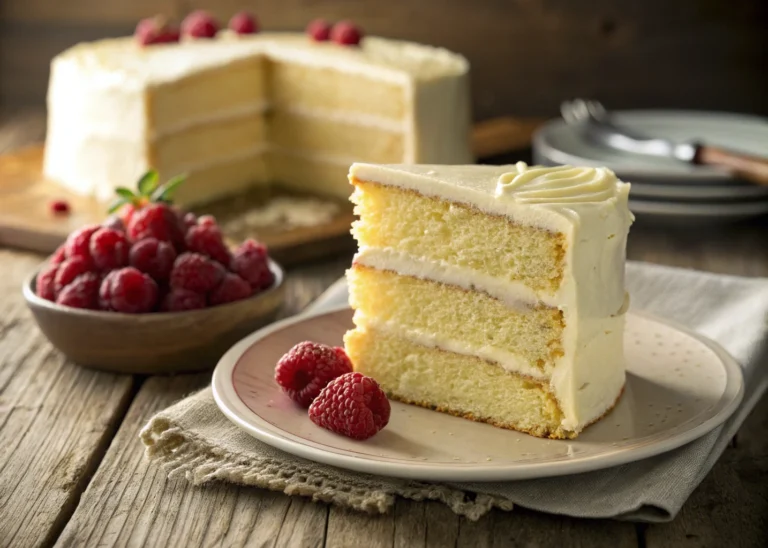
Imagine biting into a velvety, rich chocolate filling encased in a buttery, crumbly crust—pure bliss in every bite. That’s exactly what you get with these Mini Chocolate Tarts! These little delights are the perfect combination of creamy, decadent, and utterly irresistible. Whether you’re a seasoned baker or a newbie in the kitchen, this recipe is designed to make you look like a dessert pro with minimal effort.
Did you know that tarts have been a beloved dessert since medieval times? Back then, they were often filled with savory ingredients, but thank goodness we’ve evolved to sweet, chocolatey perfection! These mini tarts are not only a treat for your taste buds but also a feast for your eyes, making them perfect for parties, family gatherings, or even a solo indulgence.
What makes this recipe stand out is its simplicity. With just four easy steps, you can whip up a batch of these tarts that will impress everyone. Plus, they’re family-friendly, meaning even the kids can join in on the fun. If you loved our No-Bake Cheesecake Bites, you’re going to adore these mini chocolate tarts. They’re equally easy but offer a rich, chocolatey twist that’s hard to resist.
So, grab your apron, and let’s dive into the world of mini chocolate tarts. Trust me, once you try these, you’ll be hooked!

What is Mini Chocolate Tarts?
Ever wondered why something so small can pack such a big punch of flavor? Mini Chocolate Tarts are exactly what they sound like—tiny, bite-sized versions of the classic chocolate tart. But don’t let their size fool you; these little gems are bursting with rich, creamy chocolate goodness.
Why are they called “tarts” and not “pies”? Well, tarts are typically shallower and have a crumbly, buttery crust, while pies are deeper and often have a flakier pastry. And let’s be honest, everything tastes better in miniature form, right? It’s like the dessert version of “good things come in small packages.”
As the old saying goes, “The way to a man’s heart is through his stomach,” but I’d argue that these mini chocolate tarts can win over anyone’s heart—man, woman, or child. So, why not give them a try? You might just discover your new favorite dessert.

Why You’ll Love This Mini Chocolate Tarts
- Decadent and Delicious: The star of this recipe is the rich, creamy chocolate filling that melts in your mouth. It’s like eating a gourmet dessert from a fancy bakery, but without the hefty price tag.
- Budget-Friendly: Making these tarts at home is a fraction of the cost of buying them from a store or bakery. Plus, you can customize them to your liking, whether you prefer dark, milk, or white chocolate.
- Endless Topping Possibilities: While these tarts are amazing on their own, you can take them to the next level with toppings like fresh berries, whipped cream, or a sprinkle of sea salt. The possibilities are endless!
If you enjoyed our Mini Chocolate Tartlets Recipe, you’ll love this version too. It’s just as easy but with a slightly different twist. So, what are you waiting for? Let’s get baking!
How to Make Mini Chocolate Tarts
Quick Overview
These Mini Chocolate Tarts are incredibly easy to make, requiring just four simple steps. The buttery crust and rich chocolate filling come together in no time, making this recipe perfect for last-minute desserts or impromptu gatherings. Plus, they’re no-bake, so you don’t even need to turn on the oven!
Preparation Time: 20 minutes
Chilling Time: 1 hour
Total Time: 1 hour 20 minutes
Key Ingredients for Mini Chocolate Tarts

- For the Crust:
- 1 ½ cups graham cracker crumbs
- 6 tbsp unsalted butter, melted
- 2 tbsp granulated sugar
- For the Filling:
- 1 cup heavy cream
- 1 ½ cups semi-sweet chocolate chips
- 1 tsp vanilla extract
- Optional toppings: whipped cream, fresh berries, sea salt
Step-by-Step Instructions
- Prepare the Crust:
- In a mixing bowl, combine the graham cracker crumbs, melted butter, and sugar. Mix until the crumbs are evenly coated and resemble wet sand.
- Press the mixture firmly into the bottom and sides of a mini tart pan or muffin tin. Use the back of a spoon to create an even layer.
- Place the crusts in the refrigerator to set while you prepare the filling.
- Make the Chocolate Filling:
- In a small saucepan, heat the heavy cream over medium heat until it just begins to simmer. Do not let it boil.
- Remove the cream from the heat and add the chocolate chips. Let it sit for 2-3 minutes to allow the chocolate to melt.
- Stir the mixture until smooth and glossy, then add the vanilla extract.
- Assemble the Tarts:
- Remove the crusts from the refrigerator. Pour the chocolate filling evenly into each tart shell, filling them almost to the top.

- Gently tap the pan on the counter to remove any air bubbles.
- Chill and Serve:
- Place the tarts in the refrigerator to set for at least 1 hour.
- Once set, remove them from the pan and add your favorite toppings, such as whipped cream, fresh berries, or a sprinkle of sea salt.
What to Serve Mini Chocolate Tarts With
These mini chocolate tarts are incredibly versatile and pair well with a variety of complementary dishes and drinks. Here are a few ideas:
- Coffee or Tea: The rich chocolate flavor pairs perfectly with a cup of coffee or tea.
- Fresh Fruit Platter: Balance the richness of the tarts with a refreshing fruit platter.
- Vanilla Ice Cream: Serve with a scoop of vanilla ice cream for an indulgent dessert experience.
Top Tips for Perfecting Mini Chocolate Tarts
- Use High-Quality Chocolate: The better the chocolate, the richer and more flavorful your tarts will be.
- Don’t Overheat the Cream: Heat the cream just until it simmers. Boiling it can cause the chocolate to seize.
- Customize Your Crust: Swap graham crackers for digestive biscuits or Oreo crumbs for a different flavor profile.
- Add a Twist: Experiment with fillings like peanut butter, caramel, or orange zest for a unique twist.
Storing and Reheating Tips
- Storing: Store the tarts in an airtight container in the refrigerator for up to 3 days.
- Freezing: These tarts freeze well! Place them in a single layer in a freezer-safe container and freeze for up to 1 month. Thaw in the refrigerator before serving.
- Reheating: While these tarts are best served cold, you can let them sit at room temperature for 10-15 minutes before serving if you prefer a softer texture.
People Also Search For
- No Bake Mini Chocolate Tarts: Perfect for those who want a quick, oven-free dessert.
- Mini Chocolate Tart Calories: A single tart contains approximately 150-200 calories, depending on the toppings.
- Mini Chocolate Tart Shell Recipe: Use graham crackers, digestive biscuits, or even a shortbread crust.
- Chocolate Tart Recipe: A classic dessert that’s always a crowd-pleaser.
- Sweet Fillings for Mini Tarts: Experiment with caramel, fruit curd, or custard.
FAQs
What are the 4 types of tarts?
The four main types of tarts are fruit tarts, custard tarts, chocolate tarts, and savory tarts.
What is the difference between chocolate pie and chocolate tart?
Chocolate pie typically has a deeper filling and a flaky crust, while chocolate tarts are shallower with a crumbly, buttery crust.
Can you freeze mini chocolate tarts?
Yes, these tarts freeze well for up to 1 month.
Do you eat chocolate tart hot or cold?
Chocolate tarts are best served cold or at room temperature.
What are the four original flavors of Pop-Tarts?
The original flavors were strawberry, blueberry, brown sugar cinnamon, and apple currant.
There you have it—everything you need to know to make these irresistible Mini Chocolate Tarts. Whether you’re a chocolate lover or just looking for a simple yet impressive dessert, this recipe is sure to become a favorite. Happy baking!
Hungry for more? Check out our top rated recipes :
- How to Make a Crumbl Cookie Recipe at Home:Best Recipes of 2025
- Strawberry Oreo Crunch Cake: A Delicious Twist on a Classic
- No Sugar Chocolate: How to Make the Best Sugar-Free Chocolate at Home
- How to Make Irresistible Chocolate Covered Potato Chips at Home

Mini Chocolate Tarts
Ingredients
For the Crust:
- 1 ½ cups graham cracker crumbs
- 6 tbsp unsalted butter melted
- 2 tbsp granulated sugar
For the Filling:
- 1 cup heavy cream
- 1 ½ cups semi-sweet chocolate chips
- 1 tsp vanilla extract
Optional Toppings:
- Whipped cream
- Fresh berries raspberries, strawberries
- Sea salt
Instructions
Prepare the Crust:
- In a mixing bowl, combine graham cracker crumbs, melted butter, and sugar. Mix until the crumbs are evenly coated.
- Press the mixture firmly into the bottom and sides of a mini tart pan or muffin tin. Use the back of a spoon to create an even layer.
- Place the crusts in the refrigerator to set while you prepare the filling.
Make the Chocolate Filling:
- In a small saucepan, heat the heavy cream over medium heat until it just begins to simmer. Do not let it boil.
- Remove the cream from the heat and add the chocolate chips. Let it sit for 2-3 minutes to allow the chocolate to melt.
- Stir the mixture until smooth and glossy, then add the vanilla extract.
Assemble the Tarts:
- Remove the crusts from the refrigerator. Pour the chocolate filling evenly into each tart shell, filling them almost to the top.
- Gently tap the pan on the counter to remove any air bubbles.
Chill and Serve:
- Place the tarts in the refrigerator to set for at least 1 hour.
- Once set, remove them from the pan and add your favorite toppings, such as whipped cream, fresh berries, or a sprinkle of sea salt.
Notes
- Crust Variations: Swap graham crackers for digestive biscuits or Oreo crumbs for a different flavor.
- Chocolate Options: Use dark, milk, or white chocolate chips depending on your preference.
- Storage: Store in an airtight container in the refrigerator for up to 3 days or freeze for up to 1 month.
- Serving Tip: Let the tarts sit at room temperature for 10-15 minutes before serving for a softer texture.