Table of Contents
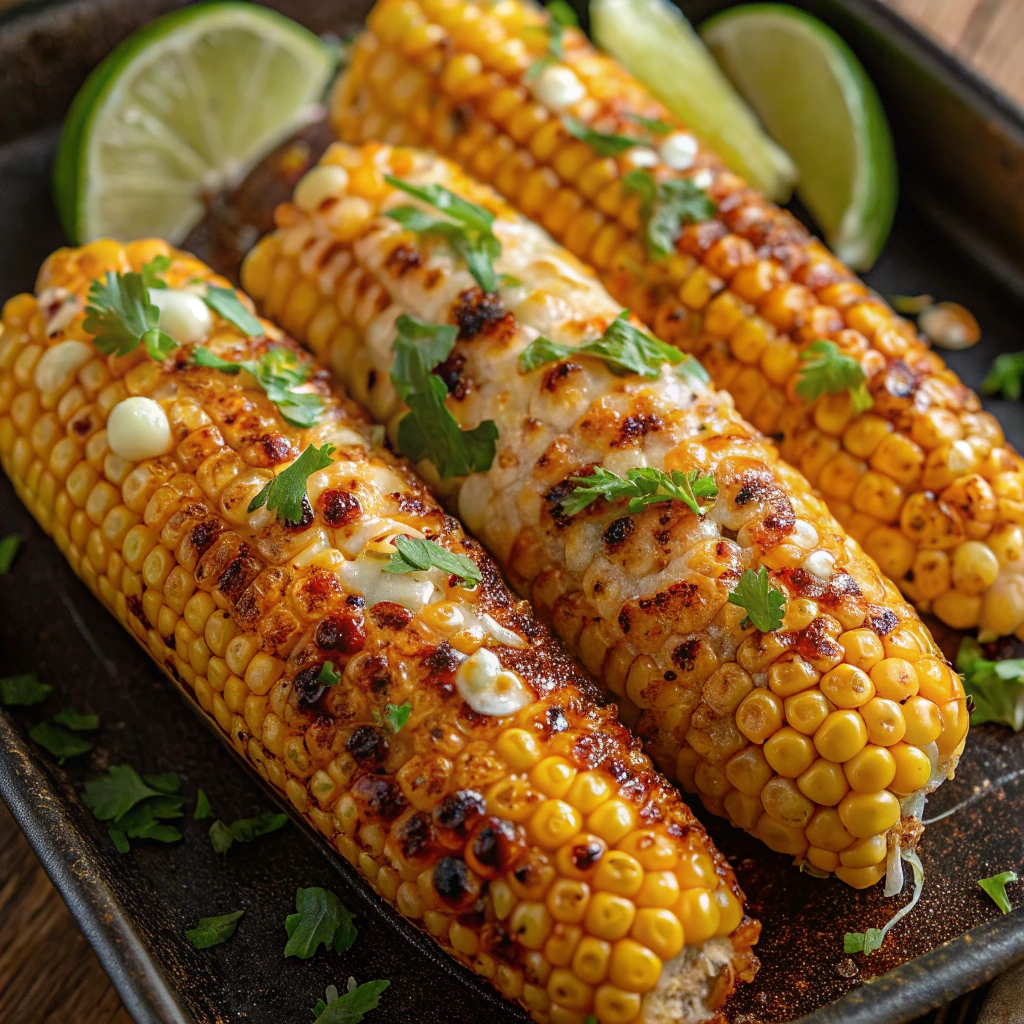
There’s something magical about biting into a perfectly cooked ear of corn slathered in rich, aromatic garlic butter. When summer rolls around and those golden ears start appearing at farmers’ markets and grocery stores, I can barely contain my excitement. But here’s my little secret – while everyone else is firing up the grill, I’m turning to my trusty oven for the most consistent, flavorful garlic butter corn on the cob ever.
Oven-roasting corn might sound unconventional to the die-hard grillers out there, but trust me on this one. The oven creates a perfect environment where the corn steams in its own juices while getting kissed with just the right amount of caramelization. And when you add that heavenly garlic butter? Pure bliss on a plate.
Today, I’m sharing my absolute favorite garlic butter corn on the cob oven recipe – one that has made even the most skeptical guests ask for seconds (and the recipe!). Whether you’re hosting a backyard gathering or simply craving a taste of summer comfort, this foolproof method delivers spectacular results every single time.
Why Oven-Roasting Corn Changes Everything
When I first discovered garlic butter corn on the cob oven methods, it was a game-changer for my summer cooking routine. Here’s why I’m convinced this approach deserves a spot in your recipe collection:
First, oven-roasting corn creates incredibly consistent results. No more worrying about hot spots on the grill or kernels cooking unevenly. The gentle, surrounding heat of the oven ensures each kernel reaches tender perfection while still maintaining that satisfying bite we all love.
Weather becomes irrelevant too! While summer storms might dampen your grilling plans, your garlic butter corn on the cob oven adventure continues unaffected indoors. I can’t count how many times this has saved our family cookouts.
Perhaps most importantly, the flavor development is unmatched. The enclosed environment of the oven allows the corn to essentially baste in its own natural sugars and the garlic butter mixture, creating layers of flavor that are simply impossible to achieve with boiling.
And let’s talk convenience – with the oven method, you’re free to focus on other dishes while your corn roasts to perfection. No standing over a hot grill or constantly checking a pot of boiling water. Just prep, pop in the oven, and enjoy the heavenly aromas filling your kitchen.
What You’ll Need for Garlic Butter Corn on the Cob
Before we dive into the cooking process, let’s gather everything you’ll need for this crowd-pleasing side dish. The beauty of garlic butter corn on the cob oven recipes is their simplicity – quality ingredients allowed to shine through straightforward preparation.
Ingredients
- 6 ears of fresh corn, husks and silk removed
- 6 tablespoons unsalted butter, softened to room temperature
- 4 cloves garlic, finely minced (about 2 tablespoons)
- 2 tablespoons fresh parsley, finely chopped
- 1 teaspoon sea salt
- ½ teaspoon freshly ground black pepper
- ¼ teaspoon smoked paprika (for that subtle smoky flavor)
- Zest of 1 small lemon (optional, but adds wonderful brightness)
- 2 tablespoons grated Parmesan cheese (for a cheesy garlic butter corn on the cob variation)
Equipment
- Aluminum foil (heavy-duty works best)
- Baking sheet
- Small mixing bowl
- Pastry brush (optional)
- Corn holders (optional, but helpful for serving)
The ingredient list might look simple, but I promise the flavors are anything but. The combination of garlic, butter, and herbs creates a mouthwatering aroma that will have everyone gathering in your kitchen asking when dinner will be ready!
Preparing the Perfect Garlic Butter Mixture
The heart and soul of this garlic butter corn on the cob oven recipe is, of course, the garlic butter. This isn’t just any butter – it’s an infusion of flavors that transforms ordinary corn into something extraordinary. Let me walk you through creating this magical mixture:
Start with room temperature butter – this is crucial! Cold butter simply won’t blend properly with the other ingredients. I usually leave mine out for about 30 minutes before I begin cooking.
In a small bowl, combine your softened butter with the minced garlic. Here’s where technique matters: use the back of a fork to really work the garlic into the butter, pressing and folding until every bit of butter has absorbed that wonderful garlic flavor.
Next, fold in your chopped parsley, sea salt, black pepper, and that wonderful smoked paprika. The paprika corn on the cob flavor profile is subtle but makes all the difference, adding a gentle smokiness that mimics grilled flavor, even though we’re using the oven.
If you’re using lemon zest (which I highly recommend), add it now and incorporate it thoroughly. The citrus brightness cuts through the richness of the butter and complements the sweetness of the corn beautifully.
For those craving cheesy garlic butter corn on the cob, this is where you’ll fold in the Parmesan cheese. The cheese adds a savory, nutty dimension that’s absolutely irresistible.
Once your garlic butter mixture is well combined, set it aside while you prepare your corn. The brief resting time allows the flavors to meld together, creating an even more delicious final product.
Step-by-Step Oven Roasting Method
Now that our garlic butter is ready, let’s get that corn roasting! This garlic butter corn on the cob oven technique is straightforward but yields professional-level results every time.
Prepping the Corn
Preheat your oven to 400°F (200°C). This temperature provides the perfect balance – hot enough to cook efficiently but not so hot that our garlic butter will burn
Prepare your corn by removing all husks and silk. A clean kitchen towel works wonderfully for rubbing away those stubborn silk strands that cling to the kernels.
Rinse each ear under cool water and pat dry thoroughly. Excess moisture will create steam that prevents proper caramelization.
The Garlic Butter Application
Tear off a piece of aluminum foil large enough to completely wrap each ear of corn (about 12×12 inches per ear).
Place an ear of corn in the center of each foil piece.
Using a pastry brush or the back of a spoon, generously coat each ear with your prepared garlic butter mixture. Don’t be shy here – make sure to cover all sides and get into the crevices between kernels.
If you’re making paprika corn on the cob with extra kick, this is the perfect time to sprinkle a little additional smoked paprika directly onto the buttered corn.
Wrapping and Roasting
Wrap each ear of corn in its foil, sealing the edges well to create a packet. The tight seal ensures that all those amazing flavors and juices stay trapped inside, essentially allowing the corn to baste in garlic butter as it cooks.
Arrange your corn packets on a baking sheet, spacing them evenly.
Place the baking sheet in your preheated oven and roast for 20-25 minutes. The exact timing depends on how tender you prefer your corn and the size of the ears.
For even more flavor development, carefully unwrap the foil packets during the last 5 minutes of cooking. This allows for light caramelization of the kernels and butter.
Your kitchen will be filled with the most incredible aroma as your garlic butter corn on the cob oven magic happens. The combination of sweet corn and garlic butter is simply intoxicating!
Serving Suggestions and Presentation
When your timer chimes, you’re just moments away from corn perfection. Here’s how to finish and serve your garlic butter corn on the cob oven masterpiece:
Carefully remove your baking sheet from the oven – those packets are hot! Using tongs, transfer the foil packets to a serving platter.
If you haven’t already opened the packets for the final minutes of cooking, now’s the time to unwrap them. Do this carefully, as hot steam will escape. I like to fold back the foil to create a little “boat” that catches any dripping butter.
For an extra flavor boost, brush any remaining garlic butter directly onto the hot corn. The heat will melt it instantly, creating a glossy, aromatic finish.
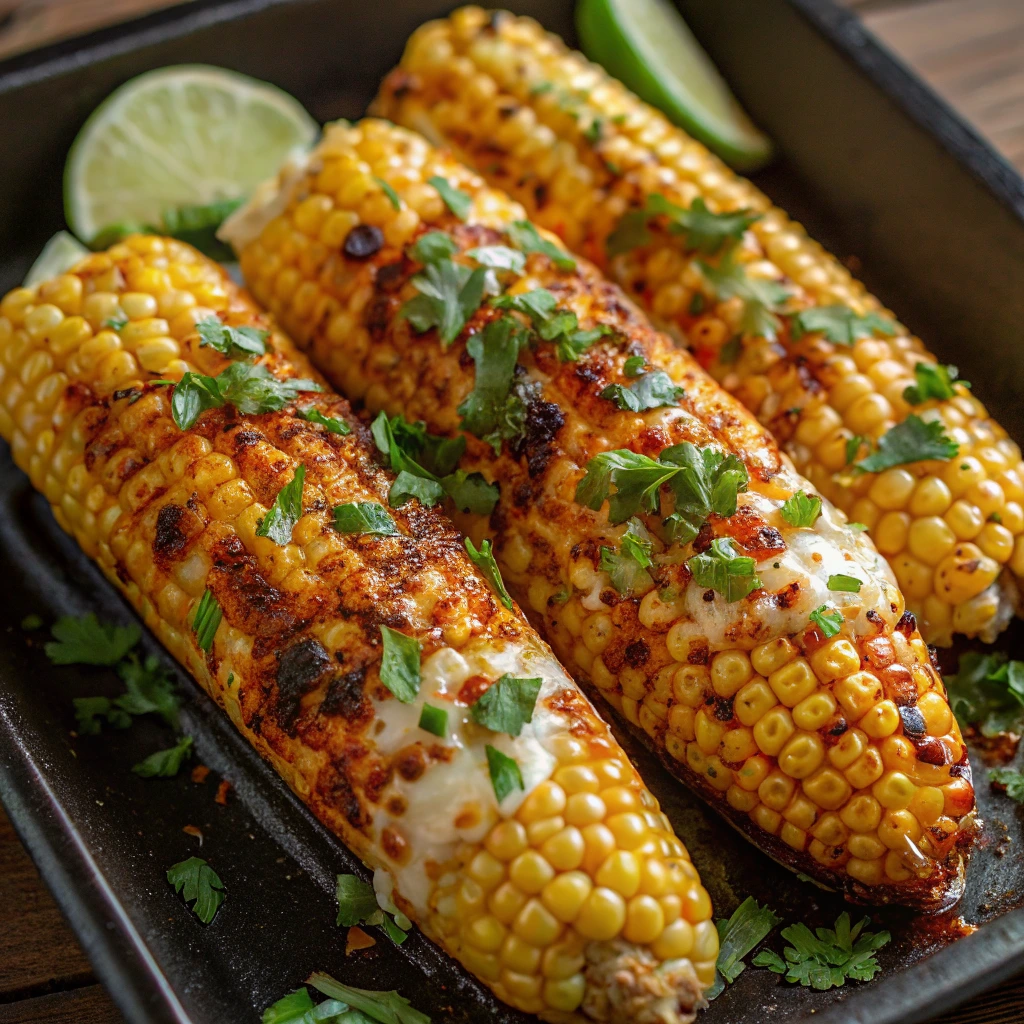
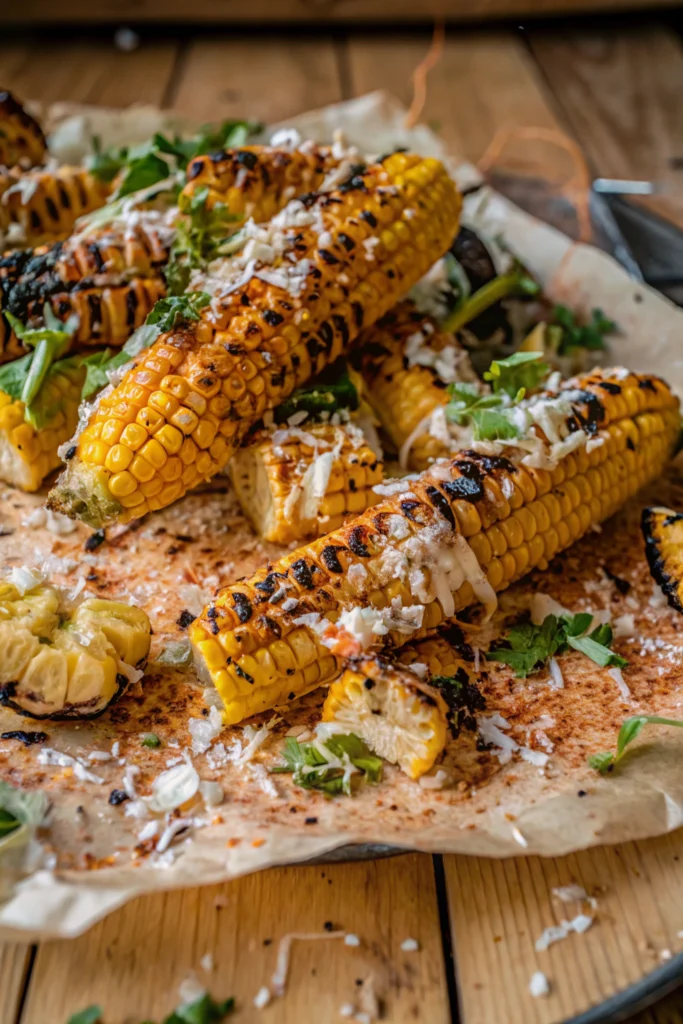
For presentation worthy of Instagram, sprinkle the corn with a little extra chopped parsley and perhaps a light dusting of paprika corn on the cob seasoning for color contrast.
If you’re serving cheesy garlic butter corn on the cob, now’s the perfect time to add another light sprinkle of freshly grated Parmesan, which will melt slightly over the hot corn.
Insert corn holders if you’re using them – not only do they make eating easier, but they also add a festive touch to your presentation.
Serve immediately while still hot. I love placing the platter center-table and watching everyone’s eyes light up as they select their ear of corn!
Flavor Variations to Try
One of the things I love most about garlic butter corn on the cob oven recipes is their versatility. Once you master the basic technique, a world of flavor possibilities opens up. Here are some of my favorite variations that have been huge hits with family and friends:
Cheesy Garlic Butter Corn on the Cob Upgrades
While we included Parmesan in our base recipe, there are so many cheese options to explore:
- Mexican-inspired: Mix cotija cheese, a squeeze of lime, and a pinch of chili powder into your garlic butter
- Mediterranean style: Blend feta cheese, fresh oregano, and lemon zest into the butter
- Spicy cheddar: Incorporate sharp cheddar and a dash of cayenne for heat-lovers
Herb-Forward Variations
Fresh herbs can completely transform your garlic butter corn on the cob oven experience:
- Cilantro-lime: Replace parsley with chopped cilantro and add lime zest instead of lemon
- Rosemary-sage: Add finely minced rosemary and sage for an autumn-inspired version
- Basil-thyme: Create a Provençal flavor profile with these classic herbs
Spice Explorations Beyond Paprika
While paprika corn on the cob has a special place in my heart, other spices bring exciting dimensions:
- Cajun seasoning for a New Orleans twist
- Everything bagel seasoning for a unique savory crunch
- Curry powder for an unexpected but delightful Indian-inspired version
Sweet and Spicy Combos
These contrasting flavor profiles create memorable taste experiences:
- Honey, garlic butter and red pepper flakes
- Brown sugar and chipotle powder
- Maple syrup and cayenne pepper
Each variation still uses our garlic butter corn on the cob oven method, just with exciting flavor twists. I encourage you to start with our base recipe, then get creative with these variations as your confidence grows!
Make-Ahead and Storage Tips
Life gets busy, and sometimes prep-ahead options are essential. The good news? This garlic butter corn on the cob oven recipe works beautifully for make-ahead situations.
Preparing in Advance
The garlic butter mixture can be made up to 3 days ahead and stored in an airtight container in the refrigerator. Just bring it back to room temperature before using so it spreads easily.
You can also prep the corn and wrap it in foil with the garlic butter up to 24 hours before cooking. Simply store the prepared packets in the refrigerator until you’re ready to bake. You may need to add 3-5 minutes to the cooking time if starting with cold corn.
For summer gatherings, I often prep several variations (including my famous paprika corn on the cob and cheesy garlic butter corn on the cob options) the morning of the event, then bake them just before guests arrive.
Storing Leftovers
If you somehow end up with leftover corn (a rare occurrence in my house!), here’s how to store it:
- Allow the corn to cool completely.
- Store corn in an airtight container in the refrigerator for up to 3 days.
- To reheat, wrap loosely in foil and warm in a 350°F oven for about 5-7 minutes until heated through.
Repurposing Leftovers
Leftover garlic butter corn on the cob from the oven can be transformed into:
- Corn salad: Cut the kernels off the cob and toss with fresh vegetables and a light vinaigrette
- Corn chowder: Add the kernels to your favorite soup recipe for instant flavor
- Cornbread: Fold the kernels into your cornbread batter before baking
- Corn salsa: Combine with diced tomatoes, onions, and jalapeños for a quick topping
These leftover ideas work particularly well with the cheesy garlic butter corn on the cob variation, as the cheese adds an extra dimension to any of these repurposed dishes.
Why This Recipe Outshines Grilled or Boiled Methods
I’ve tried every corn cooking method under the sun, and I keep coming back to this garlic butter corn on the cob oven approach. Here’s why I believe it’s superior to traditional methods:
Compared to boiling, oven-roasting preserves more nutrients and flavor. When you boil corn, many of the natural sugars and vitamins leach into the water. With our oven method, all that goodness stays right where it belongs – in the corn!
Unlike grilling, which can sometimes lead to dry, charred spots, the garlic butter corn on the cob oven technique ensures even cooking and moisture. The foil creates a perfect micro-environment where the corn steams in the garlic butter, resulting in tender, juicy kernels from end to end.
The flavor infusion is unmatched. While grilled corn gets smoky flavor from the grill and boiled corn can be seasoned after cooking, neither method allows for the deep flavor penetration that happens when corn roasts in a garlic butter bath for 20+ minutes in the oven.
Temperature control is also far more precise with oven roasting. No more watching the grill like a hawk or wondering if your boiling water is at the right temperature. Set your oven, use a timer, and enjoy perfect results every time.
And finally, let’s talk about the paprika corn on the cob flavor profile – the oven method allows the paprika to bloom in the butter and infuse into the corn in a way that’s simply not possible with other cooking methods.
Perfect Pairings for Your Corn Feast
Garlic butter corn on the cob oven recipes shine as a side dish, but what you serve alongside can elevate your entire meal. Here are some tried-and-true pairings that create a balanced and satisfying menu:
Main Dish Companions
- Grilled chicken breasts marinated in lemon and herbs
- Slow-cooked pulled pork with tangy barbecue sauce
- Cedar plank salmon with a maple glaze
- Classic burgers with all the fixings
- Vegetarian options like grilled portobello mushrooms
The rich, buttery nature of the corn complements leaner proteins beautifully, while the garlic and herbs echo flavors in your main dish.
Complementary Sides
- Fresh tomato and cucumber salad with vinaigrette
- Crispy roasted potatoes with rosemary
- Grilled zucchini and summer squash
- Watermelon, feta and mint salad
- Simple green salad with bright, acidic dressing
These lighter sides provide welcome contrast to the richness of cheesy garlic butter corn on the cob or other variations.
Beverage Pairings
- Crisp, cold lager or wheat beer
- Sauvignon Blanc or unoaked Chardonnay
- Lemonade spiked with fresh berries
- Sweet tea with mint
- Cucumber-infused water
The right beverage cuts through the butter and refreshes the palate between bites of that delicious garlic butter corn on the cob oven creation.
Dessert Follows
After enjoying paprika corn on the cob or any of our variations, these desserts provide the perfect sweet ending:
- Fresh berry cobbler with vanilla ice cream
- Lemon bars with shortbread crust
- Grilled peaches with honey and cinnamon
- Classic s’mores if you’re dining outdoors
- Watermelon wedges sprinkled with mint and lime
These lighter desserts won’t overwhelm after a satisfying meal featuring our star side dish.
Frequently Asked Questions
Can I use frozen corn for garlic butter corn on the cob oven recipes?
Yes, but with modifications. Thaw the corn completely first, pat dry with paper towels, and reduce cooking time by about 5 minutes. Fresh corn will always give superior results, but frozen can work in a pinch.
What’s the best butter to use for cheesy garlic butter corn on the cob?
Unsalted European-style butter contains more butterfat and less water, creating a richer flavor. However, any unsalted butter works well – just make sure it’s fresh and good quality since butter is a star ingredient.
My garlic burns when I make paprika corn on the cob in the oven. How can I prevent this?
If you’re experiencing burnt garlic, try mincing it less finely or adding a bit more butter to dilute the garlic concentration. Also, check that your oven isn’t running hot – an oven thermometer can help verify the actual temperature.
Can I make garlic butter corn on the cob oven-style for a large crowd?
Absolutely! This method scales beautifully. You can prepare dozens of ears in advance, then roast them in batches or use multiple oven racks. For very large gatherings, consider enlisting help with the corn wrapping assembly line.
How can I tell when my corn is perfectly done?
The perfect doneness is somewhat subjective, but generally, pierce a kernel with a knife – it should puncture easily but still have a slight firmness. For a more visual cue, the kernels will appear plump and slightly darker in color when done.
Is there a dairy-free alternative for the garlic butter?
Yes! Plant-based butter substitutes work wonderfully in this recipe. Look for ones with higher fat content for the best flavor and texture. You can also use olive oil infused with garlic as an alternative, though the flavor profile will be different.
Can paprika corn on the cob be made ahead for a potluck?
Yes! Prepare the corn packets completely, then transport them in a cooler. At your destination, they can be roasted right in their foil packets. Alternatively, roast them at home, wrap in a clean kitchen towel, then transport in an insulated carrier.
Join the Corn Celebration!
I hope this garlic butter corn on the cob oven recipe has inspired you to look at summer corn in a whole new light. There’s something so satisfying about transforming a simple vegetable into a showstopping side dish with just a few quality ingredients and a foolproof technique.
I’d love to hear how your corn adventures turn out! Did you try the classic garlic butter version, or did you venture into cheesy garlic butter corn on the cob territory? Perhaps the paprika corn on the cob variation caught your eye? Drop a comment below sharing your experience, adaptations, or questions.
If you found this recipe helpful, please consider sharing it with friends and family – everyone deserves to know the secret to perfect oven-roasted corn! Pin it for your next summer gathering or tag me in your corn creations on social media.
Until next time, happy cooking and may your summer be filled with delicious, buttery corn moments shared with those you love!
Hungry for more? Check out our top rated recipes :