Table of Contents
What Are Millionaire Bars?
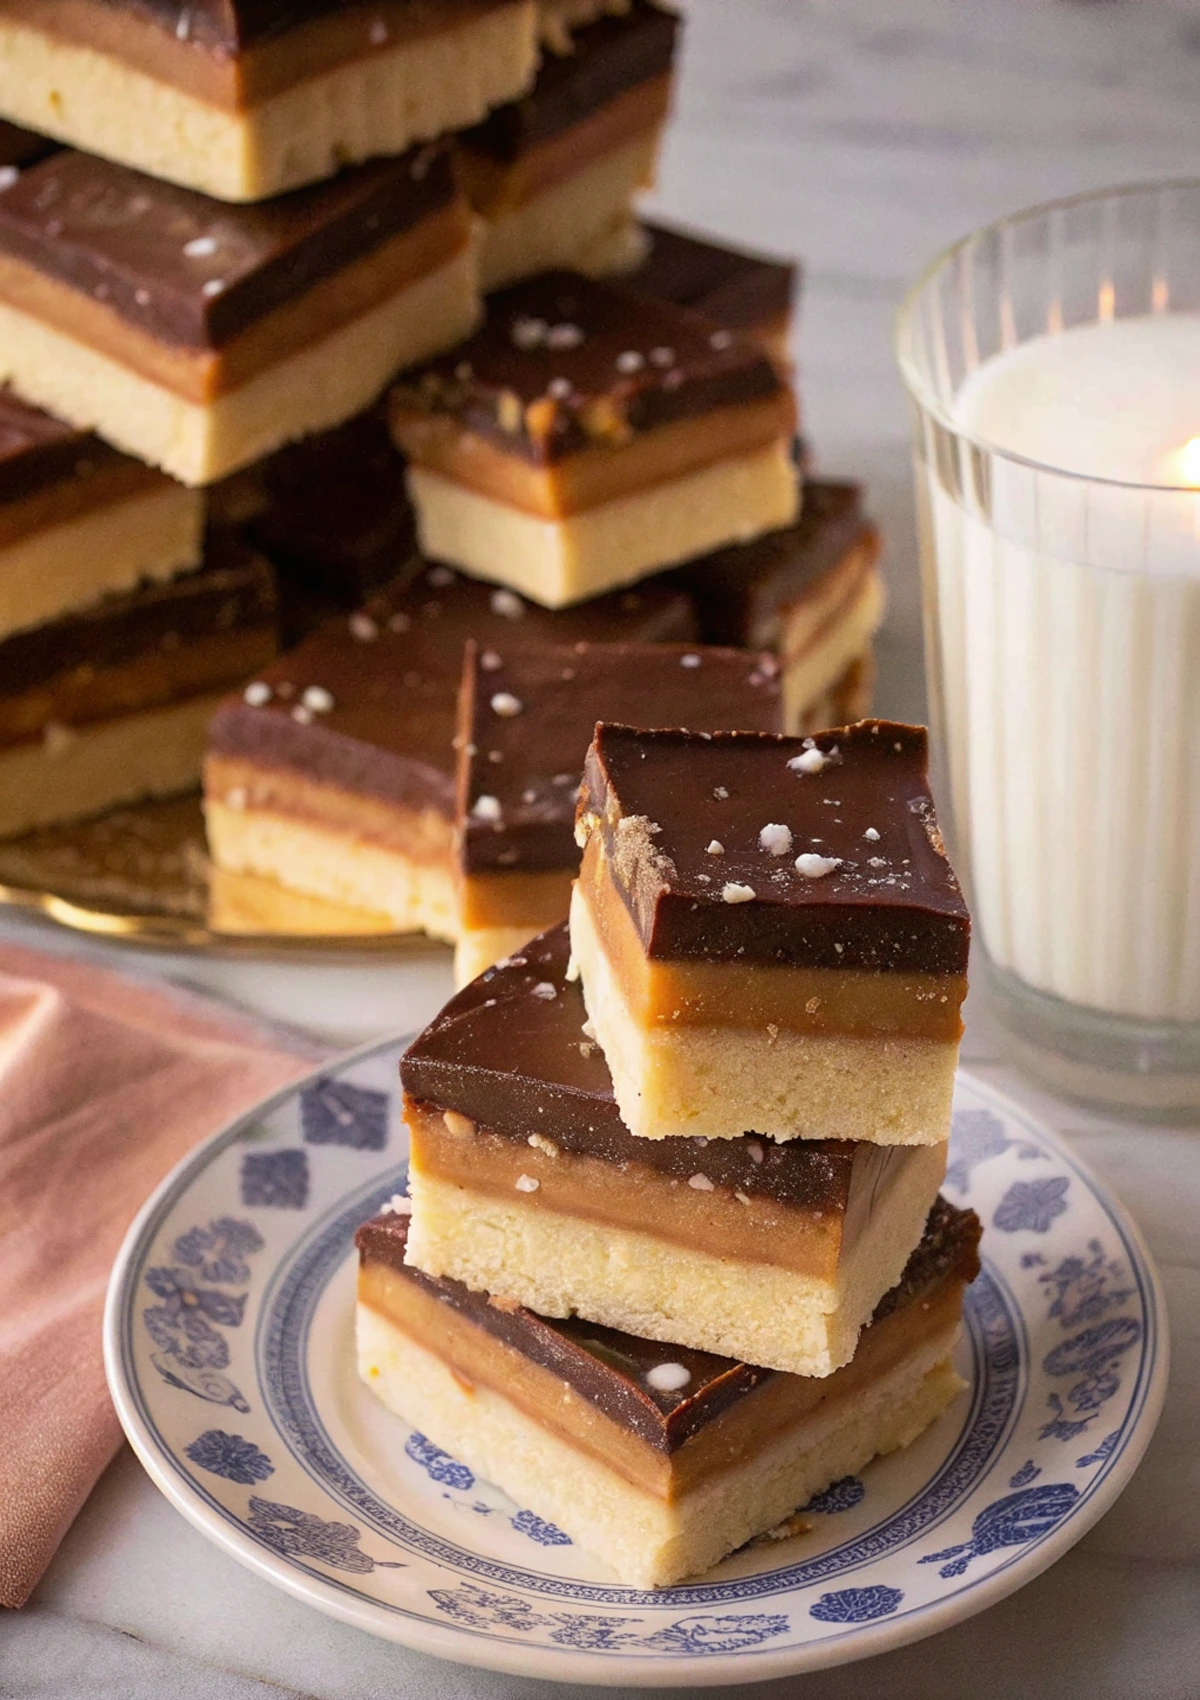
Have you ever bitten into a dessert so rich and decadent that it made you feel like a million bucks? That’s exactly the experience of savoring a Millionaire Bar. These three-layer treats consist of a buttery shortbread base, a middle layer of soft caramel, and a glossy chocolate topping that snaps perfectly when you bite into it.
Millionaire Bars have British origins, where they’re often called “Caramel Shortbread” or “Caramel Squares.” The “millionaire” nickname comes from their rich, opulent taste and appearance – truly a dessert fit for someone who has it all! While they may look intimidating, I promise this Millionaire Bars recipe is actually quite approachable, even for baking beginners.
I first attempted these beauties for a holiday cookie exchange and have been perfecting my technique ever since. The combination of textures – crumbly, chewy, and smooth – creates an irresistible treat that disappears quickly at any gathering. Let’s dive into making this showstopper dessert that will have everyone asking for your recipe!
Equipment You’ll Need
Before we jump into the Millionaire Bars recipe, let’s make sure you have everything you need. Don’t worry – no fancy equipment required!
- 8×8 or 9×9-inch baking pan (square works best for even layers)
- Parchment paper (for easy removal and clean-up)
- Medium saucepan (for the caramel)
- Mixing bowls (various sizes)
- Measuring cups and spoons
- Rubber spatula and wooden spoon
- Hand mixer or stand mixer (helpful but not essential)
- Microwave-safe bowl (for melting chocolate)
- Sharp knife (for clean cuts)
A quick tip: Line your pan with parchment paper with overhang on all sides. This creates “handles” that make lifting the entire dessert out of the pan a breeze before cutting into bars!
Ingredients for Perfect Millionaire Bars
For the Shortbread Base:
- 1 cup (2 sticks) unsalted butter, softened
- 1/2 cup granulated sugar
- 2 cups all-purpose flour
- 1/4 teaspoon salt
- 1 teaspoon vanilla extract
For the Caramel Layer:
- 1 cup (2 sticks) unsalted butter
- 1 cup light brown sugar, packed
- 1/2 cup granulated sugar
- 1/2 cup light corn syrup
- 1 (14 oz) can sweetened condensed milk
- 1/2 teaspoon salt
- 2 teaspoons vanilla extract
For the Chocolate Topping:
- 10 oz semi-sweet chocolate, chopped (or chocolate chips)
- 2 tablespoons unsalted butter
- Flaky sea salt for sprinkling (optional, but highly recommended!)
Want to make this Millionaire Bars recipe even more special? Consider high-quality chocolate like Ghirardelli or Guittard for the top layer – it truly makes a difference!
Step-by-Step: Making the Shortbread Layer
The foundation of any good Millionaire Bars is a buttery, melt-in-your-mouth shortbread. Here’s how to get it just right:
Preheat your oven to 325°F (165°C) and line your baking pan with parchment paper, leaving overhang on the sides.
Cream the butter and sugar in a large bowl using a mixer on medium speed for about 3 minutes until light and fluffy. Don’t rush this step – it’s key for that perfect shortbread texture!
Add the vanilla extract and mix until incorporated.
Combine the flour and salt in a separate bowl, then gradually add to your butter mixture, mixing on low speed until just combined. The dough should look somewhat crumbly but hold together when pressed.
Press the dough evenly into your prepared pan. I find using the bottom of a measuring cup helps create a smooth, even layer. Make sure to press it firmly – this prevents a crumbly base!
Prick the dough all over with a fork to prevent it from puffing up during baking.
Bake for 25-30 minutes until the edges are just turning golden. The center might still look slightly soft, but it will firm up as it cools.
Cool completely before adding the caramel layer. This usually takes about 30-45 minutes.
A perfect shortbread base should be firm enough to support the caramel but tender enough to bite through easily. If you’re in a rush, you can pop the pan in the refrigerator to speed up cooling, but don’t add hot caramel to a warm base or the layers will blend together!
Creating the Perfect Caramel Middle
This caramel layer is what makes Millionaire Bars truly special. It’s not your typical hard caramel – instead, we’re aiming for a soft, chewy texture that holds its shape when cut. Let’s make it happen:
Combine butter, both sugars, corn syrup, and sweetened condensed milk in a medium saucepan. This easy Millionaire Bars caramel doesn’t require a candy thermometer!
Heat over medium-low heat, stirring constantly until the butter is melted and ingredients are well combined.
Increase to medium heat and bring the mixture to a simmer. This is where patience becomes important!
Simmer for 10-15 minutes, stirring continuously to prevent burning. The caramel will gradually darken to a beautiful amber color and thicken. You’ll know it’s ready when it coats the back of a spoon and has reduced slightly.
Remove from heat and stir in the salt and vanilla extract. Be careful – the mixture will bubble up!
Pour immediately over the cooled shortbread base and spread into an even layer. Work quickly as the caramel starts setting fast!
Let cool completely – at least 2 hours at room temperature or 1 hour in the refrigerator.
Caramel troubleshooting: If your caramel is too soft after cooling, it likely needed more time to thicken. If it’s too hard, it probably simmered too long. The perfect caramel for Millionaire Bars should be soft enough to bite easily but firm enough to hold its shape when cut.
The Chocolate Topping: Finishing Your Millionaire Bars
The final layer of these Millionaire Bars is a glossy chocolate topping that adds both beauty and that satisfying snap when you bite in. Here’s how to nail it:
Place chopped chocolate and butter in a microwave-safe bowl.
Microwave in 30-second intervals, stirring between each, until just melted. Be careful not to overheat – chocolate burns easily! You can also use a double-boiler method if you prefer.
Stir until completely smooth and slightly cooled but still pourable.
Pour over the set caramel layer and quickly spread into an even layer. Work from the center outward with a spatula or the back of a spoon.
Optional but recommended: Create designs by dragging a toothpick through the chocolate in swirls, or sprinkle with flaky sea salt for that sweet-salty contrast that elevates these Millionaire Bars to another level!
Let set completely before cutting – about 2 hours at room temperature or 30-45 minutes in the refrigerator.
Pro tip: For the cleanest cuts, use a sharp knife dipped in hot water and wiped clean between slices. If your chocolate layer is cracking during cutting, let the bars come to room temperature first – cold chocolate is more likely to shatter!
How to Store Millionaire Bars
After putting all that love into your Millionaire Bars recipe, proper storage ensures they stay fresh and delicious:
- Room temperature: Store in an airtight container with parchment paper between layers for up to 4 days.
- Refrigerator: Will keep for up to 2 weeks in an airtight container. Let come to room temperature before serving for the best texture.
- Freezer: These freeze beautifully! Wrap individual bars or the entire slab (uncut) in plastic wrap, then aluminum foil, and freeze for up to 3 months. Thaw overnight in the refrigerator.
I personally like to make a double batch and freeze half for those emergency dessert situations – we all have those moments when we need something sweet ASAP!
Variations to Try
One of the reasons I love this easy Millionaire Bars recipe is how customizable it is. Here are some of my favorite twists:
Flavor Variations
- Espresso Chocolate Layer: Add 1 teaspoon of espresso powder to the melted chocolate for a mocha twist
- Orange-infused: Add orange zest to the shortbread base and a drop of orange oil to the chocolate
- Maple Caramel: Substitute 1/4 cup of the granulated sugar with pure maple syrup in the caramel layer
- Peanut Butter Swirl: Warm 1/3 cup peanut butter and swirl into the chocolate layer before it sets
Textural Additions
- Nutty Crunch: Sprinkle toasted chopped nuts (pecans, hazelnuts, or almonds) between the caramel and chocolate layers
- Cookie Base: Substitute crushed graham crackers or digestive biscuits mixed with melted butter for the shortbread
- Salted Pretzel: Add crushed pretzels to the shortbread base for a sweet-salty combination
Don’t be afraid to experiment with your Millionaire Bars! These adaptations can transform this classic treat into your own signature dessert.
Troubleshooting Common Issues
Even experienced bakers sometimes encounter challenges with Millionaire Bars recipes. Here’s how to solve the most common problems:
Caramel Too Soft
- Issue: Caramel oozes out when cutting
- Fix: Return the uncut bars to the refrigerator for 30 minutes. For next time, simmer the caramel a few minutes longer.
Caramel Too Hard
- Issue: Caramel is difficult to bite through
- Fix: Let bars come to room temperature before serving. Next time, reduce the simmering time by a few minutes.
Chocolate Cracking
- Issue: The chocolate layer shatters when cutting
- Fix: Let bars come to complete room temperature before cutting. Use a hot knife and wipe clean between cuts.
Layers Separating
- Issue: The chocolate doesn’t adhere to the caramel
- Fix: Make sure to pour the chocolate while the caramel is still slightly tacky, not completely cold.
Shortbread Too Crumbly
- Issue: Base falls apart when cutting
- Fix: Make sure to press the dough very firmly into the pan before baking and allow it to cool completely before adding caramel.
Remember, even “imperfect” Millionaire Bars taste amazing! Don’t stress if they don’t look picture-perfect on your first attempt.
Why These Millionaire Bars Are Truly Special
What makes these Millionaire Bars stand out from other desserts? It’s all about balance. The buttery shortbread provides the perfect foundation, while the soft caramel adds a sweet chewiness that complements the firm snap of the chocolate topping. Each layer plays its part in creating a multi-dimensional treat that satisfies every dessert craving in one bite.
I’ve brought these to countless gatherings, and they never fail to impress. There’s something about the name “Millionaire Bars” that piques interest, and the striking layers deliver on that promise of luxury. While they look like they took hours of complicated work, our easy Millionaire Bars recipe makes the process manageable even for those new to baking.
Whether you’re making them for a holiday cookie exchange, a potluck, or simply to treat yourself after a long week, these bars bring a touch of indulgence to any occasion. And isn’t that what great desserts are all about?
Frequently Asked Questions
Can I make Millionaire Bars without corn syrup?
Yes! You can substitute golden syrup or honey for the corn syrup in the caramel layer. The texture will be slightly different, but still delicious. Some recipes use just sweetened condensed milk and butter for a simpler caramel.
Why did my caramel crystallize?
Crystallization usually happens when sugar crystals form on the side of the pan. To prevent this, avoid stirring too vigorously, make sure all sugar dissolves completely before increasing the heat, and consider adding a teaspoon of lemon juice to the mixture.
Can I use salted butter instead of unsalted?
Yes, but reduce or eliminate the added salt in each component. I prefer starting with unsalted butter to have precise control over the saltiness of the final bars.
How do I know when the caramel is ready?
The caramel should be a deep amber color and coat the back of a spoon. If you want to be precise, it should reach about 225-235°F (107-113°C) on a candy thermometer, which is the “soft ball” stage.
Can I make these Millionaire Bars gluten-free?
Absolutely! Simply substitute the all-purpose flour with a 1:1 gluten-free flour blend in the shortbread base. The caramel and chocolate layers are naturally gluten-free.
Why is my shortbread base too hard?
Overworking the dough or overbaking are the usual culprits. Mix the shortbread ingredients just until combined, and make sure to bake just until the edges are golden.
Let’s Share Our Millionaire Bars Success!
I hope this guide helps you create absolutely stunning Millionaire Bars that taste even better than they look! The beauty of this recipe is that even if they don’t turn out picture-perfect the first time, they’ll still be deliciously impressive.
Have you tried making Millionaire Bars before? What variations have you experimented with? I’d love to hear about your experiences, challenges, and triumphs with this recipe! Drop a comment below sharing your results or any questions you might have.
If you make these bars, please take a photo and tag me on social media – I absolutely love seeing your creations! And if you discovered a brilliant variation or tip that made your Millionaire Bars even better, share it with our community of home bakers.
Until next time, happy baking! Remember – with a little patience and love, you can create bakery-quality Millionaire Bars right in your own kitchen.
Hungry for more? Check out our top rated recipes :