Table of Contents
Why This Pineapple Upside Down Cake Will Become Your New Obsession
There’s something magical about that first moment when you flip a pineapple upside down cake onto a serving plate. The anxious anticipation as you carefully lift the pan, followed by the satisfying reveal of that glistening, caramelized fruit layer. It’s kitchen drama at its finest!
I still remember my first attempt at this classic dessert. I was nervous about the flipping part (spoiler alert: it ended up partially stuck to the pan), but even that slightly messy cake disappeared within hours at our family gathering. That’s the beauty of this pineapple upside down cake recipe—it’s incredibly forgiving and delicious even when imperfect.
What makes this particular recipe perfect for beginners is that it combines simple ingredients with straightforward techniques to create something that looks like you spent hours in the kitchen. The truth? This cake comes together in about 15 minutes of prep time, and the oven does the rest of the work!
What You’ll Need for the Perfect Pineapple Upside-Down Cake
For the Caramelized Topping
- ¼ cup (4 tablespoons) unsalted butter
- ⅔ cup packed brown sugar (light or dark both work beautifully)
- 1 can (20 oz) pineapple rings in juice, drained (reserve the juice!)
- Maraschino cherries (optional, but they add that classic look)
For the Cake Batter
- 1½ cups all-purpose flour
- 1½ teaspoons baking powder
- ¼ teaspoon salt
- ½ cup (1 stick) unsalted butter, softened
- ¾ cup granulated sugar
- 2 large eggs, room temperature
- 1 teaspoon vanilla extract
- ¼ cup sour cream (my secret ingredient for moisture!)
- ¼ cup pineapple juice (from your canned pineapple)
Kitchen Tools You’ll Need
- 9-inch round cake pan (a cast iron skillet works wonderfully too!)
- Parchment paper (for lining the bottom, trust me on this one)
- Mixing bowls (one for dry ingredients, one for wet)
- Electric mixer (hand or stand mixer both work)
- Measuring cups and spoons
- Spatula for spreading the batter
The Foolproof Method for Perfect Pineapple Upside-Down Cake Every Time
Preparing Your Pan for Success
Preheat your oven to 350°F (175°C). This temperature ensures your cake bakes evenly without burning the sugary topping.
If using a regular cake pan, line the bottom with parchment paper and spray the sides with non-stick spray. This might seem like an extra step, but it’s your insurance policy against sticking!
Melt the 4 tablespoons of butter directly in your pan (if using a skillet) or in the microwave and then pour into your cake pan.
Sprinkle the brown sugar evenly over the melted butter. Don’t worry about mixing them—the heat from the oven will create that perfect caramel sauce.
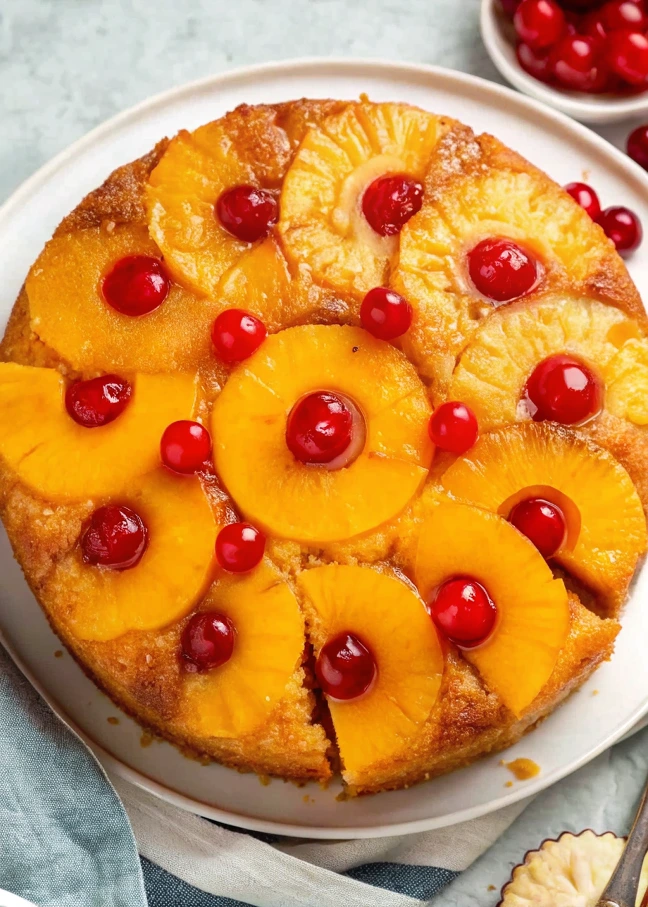
Arrange pineapple rings in a single layer over the brown sugar. I typically fit about 7 rings—one in the center and six around it. Place cherries in the center of each pineapple ring and in any gaps between rings for that classic look.
Creating the Perfect Cake Batter
In a medium bowl, whisk together the flour, baking powder, and salt. Setting these dry ingredients aside ensures they’ll be evenly distributed in your final batter.
In a larger bowl, beat the softened butter and granulated sugar until light and fluffy, about 3 minutes. This step is crucial for a tender cake texture—don’t rush it!
Add eggs one at a time, beating well after each addition. Then mix in the vanilla extract.
Here’s where the magic happens: Alternate adding your dry ingredients and the wet ingredients (sour cream and pineapple juice) to the butter mixture, starting and ending with the dry ingredients. I usually do: ⅓ dry, ½ wet, ⅓ dry, ½ wet, ⅓ dry.
Mix just until combined after each addition—overmixing leads to a tough cake, and nobody wants that!
Baking to Perfection
Carefully spoon the batter over your prepared pineapple layer, spreading it gently with a spatula. Try not to disturb your beautiful arrangement!
Bake for 40-45 minutes, or until a toothpick inserted in the center comes out clean. The cake should be golden brown and springy to the touch.
Allow the cake to cool in the pan for exactly 10 minutes—this timing is crucial! Too short, and the topping will be too runny; too long, and it might stick to the pan.
Place your serving plate upside down on top of the cake pan, then quickly (and confidently!) flip them over together. Leave the pan in place for about 30 seconds to allow the caramel topping to settle onto the cake.
Gently lift the pan away. If any pineapple pieces stick to the pan, simply place them back onto the cake—no one will ever know!
My Best Tips for Pineapple Upside-Down Cake Success
Getting the Perfect Caramel Topping
The brown sugar and butter layer is what gives this pineapple upside-down cake recipe its signature gooey, caramelized top. Make sure your brown sugar is fresh and not dried out for the best results. If your brown sugar has hardened, place a slice of bread in the container overnight, and it’ll soften right up!
The Fresh vs. Canned Pineapple Debate
While fresh pineapple is delicious for eating, canned pineapple rings actually work better in this cake. They’re consistent in size and sweetness, plus you get that precious juice to use in your cake batter! If you do use fresh pineapple, be aware that the enzyme bromelain in fresh pineapple can affect how your cake sets, so you might need to par-cook the pineapple first.
The Secret to a Moist Cake
Sour cream is my not-so-secret weapon in this recipe. It adds moisture and a subtle tanginess that balances the sweetness perfectly. No sour cream on hand? Greek yogurt makes an excellent substitute!
Delicious Variations on the Classic Pineapple Upside-Down Cake
Tropical Twist Pineapple Upside-Down Cake
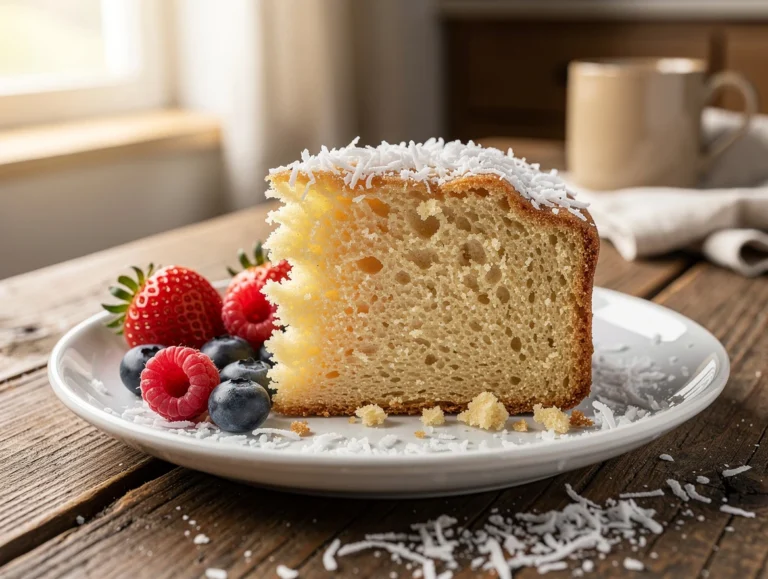
Add ½ cup shredded coconut to the batter and replace the vanilla extract with coconut extract for a tropical vacation in cake form. You can even toast some additional coconut to sprinkle around the edges after flipping!
Spiced Pineapple Upside-Down Cake
Add ½ teaspoon cinnamon and ¼ teaspoon nutmeg to your dry ingredients for a warm, spiced version that’s perfect for fall and winter gatherings. The spices complement the caramelized flavors beautifully.
Mini Pineapple Upside-Down Cakes
Use a muffin tin to create individual servings! Place a pineapple chunk and a cherry in each cup, followed by a small spoonful of the butter-sugar mixture, then top with batter. Reduce baking time to about 20-25 minutes.
Serving and Storage Suggestions
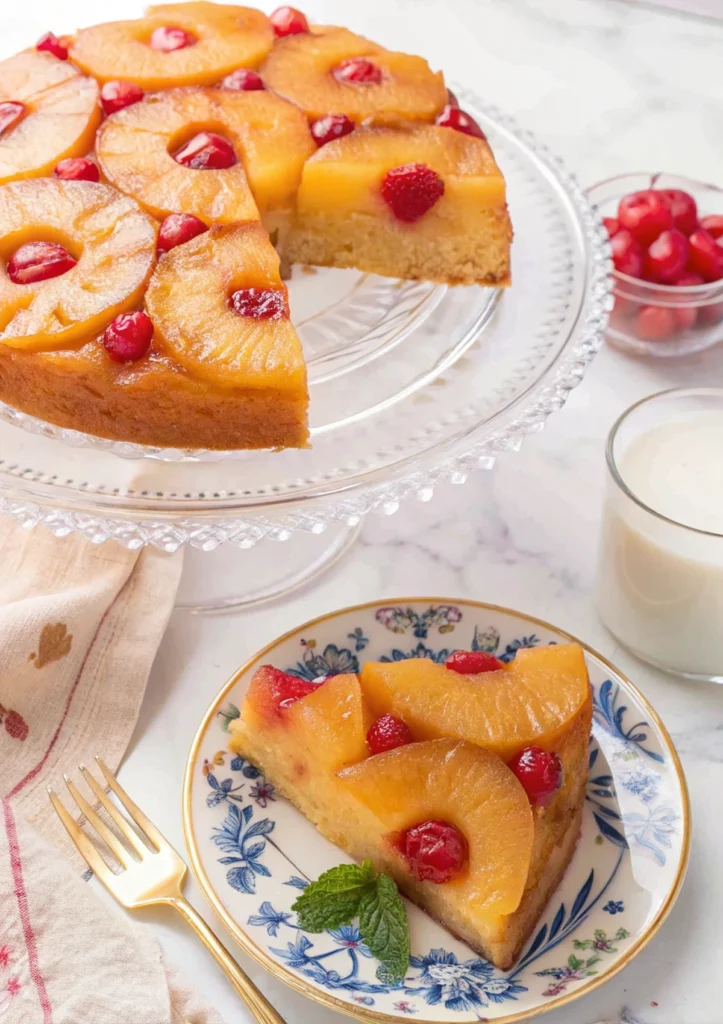
This pineapple upside-down cake recipe creates a dessert that’s absolutely divine when served warm, about 30 minutes after it comes out of the oven. The caramel is still slightly gooey, and the cake is at its tender best.
For an extra-special treat, serve each slice with a scoop of vanilla ice cream or a dollop of lightly sweetened whipped cream. The contrast between the warm cake and cold topping is simply heavenly!
If you somehow end up with leftovers (it happens, though rarely in my house!), cover the cake loosely with foil and store at room temperature for up to 2 days. For longer storage, refrigerate for up to 5 days, but bring slices to room temperature before enjoying, or warm them briefly in the microwave for about 15 seconds.
Troubleshooting Your Pineapple Upside-Down Cake
Help! My Cake Stuck to the Pan
If disaster strikes and a significant portion of your cake sticks to the pan, don’t panic! Carefully remove the stuck pieces and arrange them back on top of your cake. Then, make a quick glaze with powdered sugar and a bit of pineapple juice to drizzle over the top. No one will ever know there was a problem!
My Caramel Topping Is Too Hard
This usually happens when the cake cools too long in the pan before flipping. Remember that crucial 10-minute cooling period! If your topping has hardened, warm the cake slightly in the microwave before serving to soften it back up.
The Center of My Cake Is Undercooked
Oven temperatures can vary widely, so always use the toothpick test rather than relying solely on timing. If you notice the edges browning too quickly but the center is still underdone, loosely cover the cake with aluminum foil for the remainder of the baking time.
Frequently Asked Questions About Pineapple Upside-Down Cake
Can I make pineapple upside-down cake ahead of time?
Yes! While it’s best served the day it’s made, you can prepare it up to 24 hours in advance. Store it covered at room temperature, and consider warming slices slightly before serving.
Can I freeze pineapple upside-down cake?
Absolutely. Wrap individual slices or the entire cake (once completely cooled) tightly in plastic wrap, then aluminum foil, and freeze for up to 2 months. Thaw overnight in the refrigerator, then bring to room temperature or warm slightly before serving.
Can I use a different fruit instead of pineapple?
While it wouldn’t be a pineapple upside-down cake recipe anymore, you can absolutely use the same technique with other fruits! Peaches, apples, or pears work beautifully. Just make sure to slice them thinly and remove any excess moisture.
Do I have to use maraschino cherries?
Nope! They’re traditional and add that pop of color, but the cake is delicious without them. You could substitute fresh or frozen cranberries for a tart contrast, or simply leave the centers of the pineapple rings empty.
Why does my cake sink in the middle?
This usually happens when the cake is underbaked or when the oven door is opened too early in the baking process. Make sure your oven is fully preheated, and resist the urge to peek before the 30-minute mark!
Why This Pineapple Upside-Down Cake Recipe Will Become a Family Favorite
There’s something wonderfully nostalgic about a pineapple upside-down cake. Perhaps it’s the retro vibes, or maybe it’s just that perfect balance of sweet, tangy, and buttery flavors that makes everyone smile with the first bite.
What I love most about sharing this recipe is knowing that it might become part of your family traditions too. Maybe you’ll make it for birthday celebrations, weekend treats, or whenever you need a foolproof dessert that looks impressive but doesn’t require professional baking skills.
Have you tried making this pineapple upside-down cake? I’d love to hear how it turned out! Drop a comment below sharing your experience or any creative twists you added to make it your own. And if you snap a photo of your creation, be sure to tag me on social media—seeing your successful bakes absolutely makes my day!
Until next time, happy baking, friends! Remember, even if your cake doesn’t look perfect, it will still taste amazing—and that’s what really matters.
Hungry for more? Check out our top rated recipes :