Table of Contents
The Magic of Chocolate and Orange: A Perfect Pairing
There’s something almost magical about the combination of chocolate and orange. That first bite where rich, velvety chocolate meets the bright, zesty pop of citrus creates a flavor explosion that’s both comforting and exciting. I still remember the first time I tasted this combination – it was a chocolate orange ball that my grandmother would slip into my Christmas stocking each year. That distinctive crack-and-unwrap ritual always signaled the start of holiday celebrations.
Today, I’m sharing my absolute favorite way to enjoy this classic flavor pairing: a homemade chocolate orange cake that’s become my go-to for special occasions (and sometimes just because it’s Wednesday). This isn’t just any chocolate cake with a hint of orange – it’s a carefully balanced dessert where both flavors shine equally, creating something truly spectacular.
What makes this chocolate orange cake special is its versatility. Dress it up with a glossy ganache for celebrations, or keep it simple with a dusting of powdered sugar for everyday indulgence. The orange flavor comes from both zest and juice, ensuring that citrus brightness shines through the rich chocolate depth.
Let’s bring this delightful dessert into your kitchen today!
What You’ll Need: Ingredients and Equipment
Key Ingredients for Chocolate Orange Cake
Before we start mixing and baking, let’s gather everything we need. The beauty of this chocolate orange cake is that it uses mostly pantry staples with a few fresh ingredients that make all the difference:
- 2 cups all-purpose flour
- 1¾ cups granulated sugar
- ¾ cup unsweetened cocoa powder
- 1½ teaspoons baking powder
- 1½ teaspoons baking soda
- 1 teaspoon salt
- 2 large eggs, room temperature
- 1 cup buttermilk (or 1 cup milk with 1 tablespoon white vinegar)
- ½ cup vegetable oil
- 2 teaspoons vanilla extract
- 3 medium oranges (for zest and juice)
- 1 cup hot coffee (brings out the chocolate flavor!)
For the orange chocolate frosting:
- 1 cup unsalted butter, softened
- 3½ cups powdered sugar
- ½ cup unsweetened cocoa powder
- 2-3 tablespoons fresh orange juice
- 2 tablespoons orange zest
- 1 teaspoon vanilla extract
- Pinch of salt
Essential Kitchen Tools
Having the right tools ready will make this baking adventure much smoother:
- Two 9-inch round cake pans
- Parchment paper
- Mixing bowls (large and medium)
- Electric mixer (stand or handheld)
- Microplane or zester
- Citrus juicer
- Measuring cups and spoons
- Rubber spatula
- Cooling rack
- Offset spatula (for frosting)
- Cake stand or serving plate
Preparing Your Workspace: The Key to Baking Success
Before diving into our chocolate orange cake adventure, let’s set ourselves up for success. I’ve learned (the hard way) that a little prep work saves a ton of hassle later!
First, preheat your oven to 350°F (175°C). This gives your oven plenty of time to reach the right temperature – an often overlooked but crucial step for even baking.
Next, prepare your cake pans. Trace the bottoms on parchment paper, cut out the circles, and place them in the pans. Then lightly grease the sides and parchment with butter or cooking spray. This double insurance means your chocolate orange cake will release perfectly every time.
Now, measure all your ingredients before you start mixing. This French technique called “mise en place” (everything in its place) is a game-changer for stress-free baking. I like to group ingredients based on when they’ll be used – dry ingredients in one area, wet in another.
Finally, zest and juice your oranges. The zest contains all those fragrant oils that give our chocolate orange cake its distinctive flavor, so don’t skip this step! Remember to zest before juicing – it’s much easier that way.
The Perfect Chocolate Orange Cake Batter
Mixing the Dry Ingredients
In a large bowl, whisk together the flour, sugar, cocoa powder, baking powder, baking soda, and salt. This thorough mixing ensures the leavening agents are evenly distributed throughout your chocolate orange cake, giving you that perfect rise and texture.
Take a moment to sift the cocoa powder if it’s lumpy – this extra step makes a noticeable difference in the smoothness of your batter. If you don’t have a sifter, a fine-mesh strainer works perfectly.
Combining the Wet Ingredients
In a separate medium bowl, whisk the eggs until slightly frothy. Add the buttermilk, vegetable oil, vanilla extract, 3 tablespoons of orange zest, and ¼ cup fresh orange juice. Whisk until everything is well combined.
The buttermilk in this chocolate orange cake recipe adds a subtle tang that complements the orange flavor while also reacting with the baking soda to create a tender crumb. If you don’t have buttermilk on hand, the milk and vinegar substitute works wonderfully.
Bringing It All Together
Now for the magic moment! Make a well in the center of your dry ingredients and pour in the wet mixture. Begin to stir gently, starting from the center and working outward.
When the batter is about halfway mixed (still with some dry patches), pour in the hot coffee. The heat helps bloom the cocoa powder, intensifying the chocolate flavor in your chocolate orange cake. Continue stirring until just combined – overmixing can make your cake tough.
The batter will be quite thin – don’t worry, this is exactly what we want! A thinner batter results in a moister cake with a tender crumb.
Baking Your Chocolate Orange Cake to Perfection
Divide the batter evenly between your prepared pans. A kitchen scale is helpful here, but eyeballing works too – just fill each pan about two-thirds full.
Give the pans a gentle tap on the counter to release any large air bubbles. This helps prevent big holes in your finished chocolate orange cake.
Slide the pans onto the center rack of your preheated oven and set a timer for 28 minutes. Resist the urge to open the oven door while baking, as the temperature drop can cause your cakes to sink in the middle.
Your chocolate orange cake layers are done when:
- The tops spring back when lightly touched
- A toothpick inserted in the center comes out with just a few moist crumbs (not wet batter)
- The edges have just begun to pull away from the sides of the pan
Every oven is different, so your baking time might vary slightly. If needed, give it a few more minutes, checking in 2-minute increments.
Once baked, let the cakes cool in their pans for 10 minutes – this setting period makes them less fragile for handling. Then turn them out onto a cooling rack to cool completely before frosting.
Creating a Luscious Orange Chocolate Frosting
While your chocolate orange cake layers cool, it’s the perfect time to whip up the frosting. This orange-infused chocolate buttercream is the perfect complement to our cake, doubling down on both flavor profiles.
In a large bowl using an electric mixer, beat the softened butter until creamy and pale – about 2-3 minutes. Don’t rush this step; properly creamed butter creates the foundation for silky-smooth frosting.
Sift together the powdered sugar and cocoa powder to remove any lumps. Gradually add this mixture to the butter, about half a cup at a time, beating well after each addition. Start your mixer on low to avoid a sugar cloud explosion (learned that lesson the messy way!).
Once all the sugar and cocoa are incorporated, add the orange juice, orange zest, vanilla extract, and salt. Beat for an additional 3-5 minutes until the frosting is light, fluffy, and easily spreadable.
If your frosting seems too thick, add orange juice a teaspoon at a time. If it’s too thin, add more powdered sugar. The perfect consistency should hold soft peaks and spread easily without being runny.
Assembling Your Chocolate Orange Cake Masterpiece
Now comes the fun part – bringing your chocolate orange cake together! Make sure your cake layers are completely cool before starting; even slightly warm cakes can melt your frosting.
Place your first layer on a cake stand or serving plate. Pro tip: put small strips of parchment paper under the edges of the cake to keep your plate clean while frosting. You’ll pull these out when you’re done.
Spread about a cup of frosting evenly over the first layer, taking it all the way to the edges. This generous filling ensures every bite has that perfect cake-to-frosting ratio.
Gently place the second layer on top, flat side up for a level cake. Apply a thin layer of frosting all over the cake – this is called a crumb coat. It seals in any loose crumbs and provides a base for your final layer of frosting.
Refrigerate the cake for about 20 minutes to set this initial layer. Then apply the remaining frosting, creating swirls and patterns as you like. I find an offset spatula gives the most control for a beautiful finish.
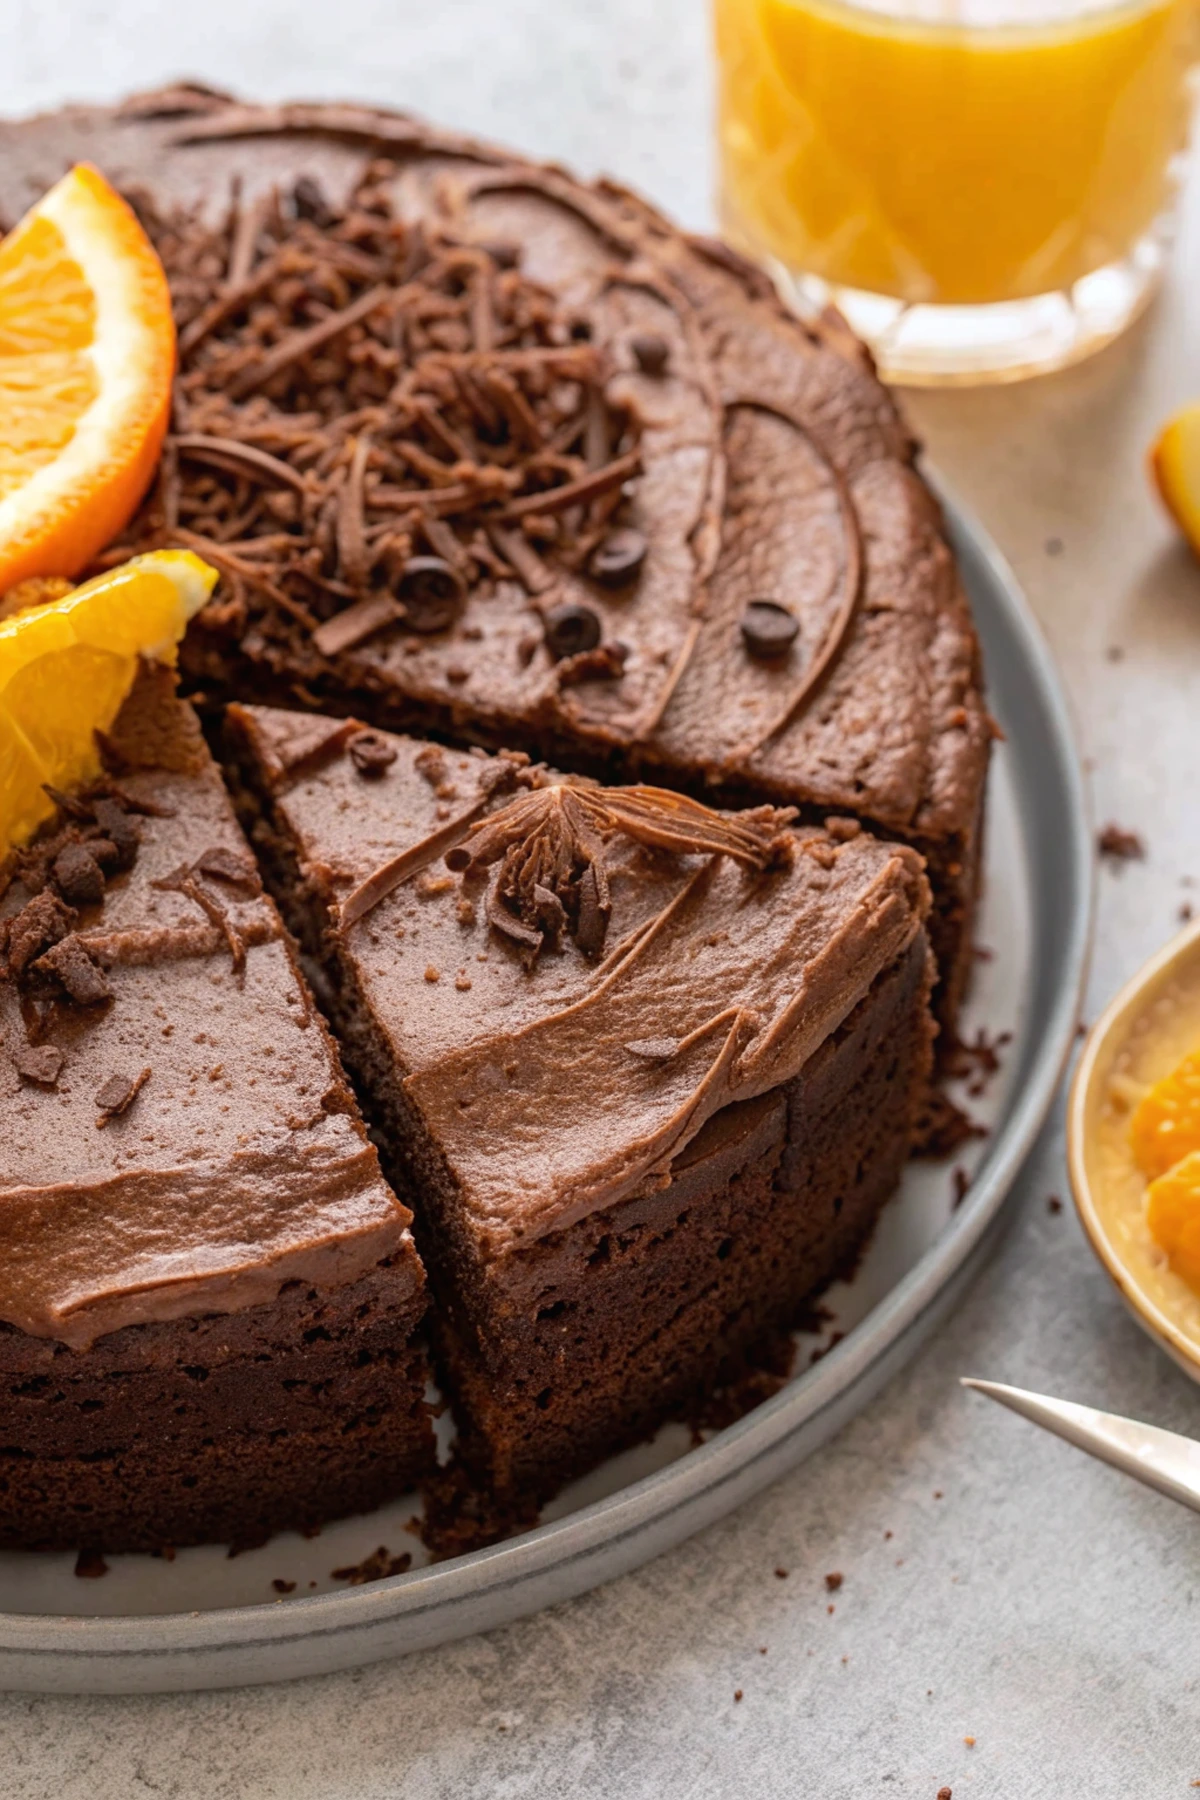
For a special touch, decorate your chocolate orange cake with candied orange slices, chocolate shavings, or a sprinkle of additional orange zest. These garnishes not only look beautiful but also give guests a hint of the flavors inside.
Serving and Storing Your Chocolate Orange Cake
Let your assembled cake sit at room temperature for about 30 minutes before serving. This allows the flavors to fully develop and the frosting to soften slightly, creating the perfect texture for that first delicious bite.
For serving, a serrated knife dipped in hot water (and wiped dry) between cuts will give you clean, beautiful slices of chocolate orange cake. Pair with coffee, tea, or even a small glass of orange liqueur for an extra-special dessert experience.
If you have leftovers (though in my house, that’s rare with this cake!), store your chocolate orange cake covered at room temperature for up to 3 days. For longer storage, refrigerate for up to a week, but always bring slices back to room temperature before serving for the best flavor and texture.
Variations to Try: Making This Chocolate Orange Cake Your Own
Triple Chocolate Orange Cake
For true chocolate lovers, try transforming this into a triple chocolate orange cake by adding 1 cup of chocolate chips to the batter and finishing with a chocolate ganache drip over your frosted cake. The combination of chocolate cake, chocolate frosting, and chocolate ganache with orange undertones is absolutely divine.
Orange Cake with Chocolate Filling
Flip the focus by making the cake layers more orange-forward and concentrating the chocolate in the filling. Add an additional tablespoon of orange zest to the cake batter and make a chocolate ganache filling for between the layers. Top with orange buttercream for an orange cake variation that still honors the chocolate pairing.
Chocolate Orange Bundt Cake
No time for layer cake assembly? This batter works beautifully in a bundt pan (bake at 350°F for about 45-50 minutes). Once cooled, drizzle with a simple orange glaze made from powdered sugar and fresh orange juice. This simplified chocolate orange cake version is perfect for brunches or casual gatherings.
Gluten-Free Chocolate Orange Cake
This recipe adapts well to gluten-free baking. Simply substitute the all-purpose flour with your favorite 1:1 gluten-free baking blend. The moisture from the oil and buttermilk helps prevent the dryness that sometimes affects gluten-free baked goods.
Troubleshooting: Common Chocolate Orange Cake Challenges
Cake Layers Sinking in the Middle
If your chocolate orange cake layers sink in the center, a few culprits might be to blame:
- Your oven temperature may be too low – consider using an oven thermometer to check
- Opening the oven door too early during baking
- Expired leavening agents – replace baking powder and soda every 6 months
- Overmixing the batter, which can incorporate too much air
Dry Cake Texture
A dry chocolate orange cake is disappointing, but easily avoidable:
- Be careful not to overbake – check a few minutes before the suggested time
- Measure flour by spooning it into measuring cups rather than scooping directly
- Store properly to maintain moisture
- Make sure you’re adding the full amount of oil and buttermilk
Frosting Too Runny
If your orange chocolate frosting won’t hold its shape:
- Make sure your butter is just softened, not melted
- Add powdered sugar gradually until you reach the right consistency
- Chill the frosting for 15-20 minutes to firm it up
- Avoid adding too much orange juice – start with less and add more as needed
FAQ: Your Chocolate Orange Cake Questions Answered
Can I make this chocolate orange cake ahead of time?
Absolutely! You can bake the layers up to 2 days in advance, wrap them well in plastic wrap, and store at room temperature. The frosting can be made 1 day ahead and refrigerated – just bring to room temperature and re-whip before using. Fully assembled, the cake keeps beautifully for 3 days at room temperature or up to a week refrigerated.
Can I use orange extract instead of fresh orange?
While fresh orange zest and juice provide the most vibrant flavor for your chocolate orange cake, you can substitute in a pinch. Use 1½-2 teaspoons of orange extract in the cake batter and ½-1 teaspoon in the frosting. You’ll miss some of the complexity that fresh ingredients provide, but you’ll still get that chocolate-orange magic.
Why add coffee to a chocolate orange cake?
Coffee enhances the chocolate flavor without making the cake taste like coffee. The hot liquid also helps “bloom” the cocoa powder, releasing more of its flavor compounds. If you prefer not to use coffee, hot water will work, but you’ll miss some depth of flavor.
Can I make cupcakes instead of a layer cake?
Definitely! This chocolate orange cake batter makes wonderful cupcakes. Fill liners about ⅔ full and bake at 350°F for 18-22 minutes. The recipe yields approximately 24 cupcakes.
How can I ensure my chocolate orange cake is moist?
The key to moisture is proper measuring (especially not using too much flour), not overbaking, and the inclusion of oil rather than just butter in the batter. The buttermilk and coffee also contribute significantly to the cake’s moisture level.
What’s the secret to getting enough orange flavor?
The trick is using both the zest and juice. The zest contains the essential oils where much of the orange flavor resides, while the juice adds brightness. Using fresh oranges rather than bottled juice makes a noticeable difference in your chocolate orange cake.
Your Chocolate Orange Cake Journey Awaits!
There’s something truly special about the moment when someone takes their first bite of this chocolate orange cake – that look of surprise and delight as the flavors unfold. It’s one of my favorite baking experiences to share, and now it can be yours too.
I’d love to hear how your chocolate orange cake adventure goes! Did you try one of the variations? Did you discover a decoration technique that made it extra special? Perhaps you found a perfect beverage pairing? Drop a comment below to share your experience or any questions that came up during your baking.
Don’t forget to save this recipe for your next celebration – or for when you simply deserve something extraordinary. After all, sometimes Tuesday needs cake too!
Happy baking, friends! May your kitchen be filled with the intoxicating aroma of chocolate and orange, and your table surrounded by smiling faces enjoying your delicious creation.
Hungry for more? Check out our top rated recipes :