Table of Contents
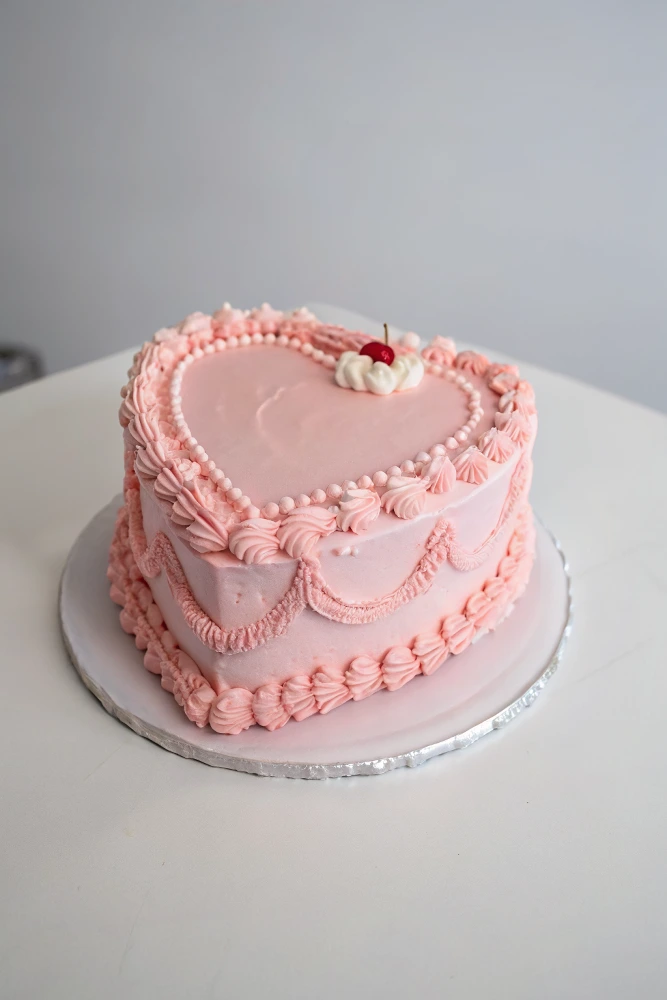
The Magic of a Heart Cake: Why They’re Always a Hit
There’s something undeniably special about presenting someone with a heart cake. Whether it’s for Valentine’s Day, an anniversary, or just because, a heart-shaped dessert communicates love in a way words sometimes can’t. I still remember the first time I made one for my partner’s birthday – the look of surprise and delight was absolutely priceless!
Heart cakes aren’t just about the shape, though that’s certainly eye-catching. They’re about the intention behind them. When you take the time to bake something in this meaningful form, you’re creating more than dessert – you’re crafting a memory.
Let me guide you through creating your own heart cake masterpiece that’s as delicious as it is beautiful. I’ve spent years perfecting these techniques, and I’m thrilled to share them with you today!
Essential Equipment for Your Heart Cake Success
Before we dive into mixing and baking, let’s make sure you have everything you need. The right tools make all the difference between a smooth baking experience and an unnecessarily complicated one.
Heart Shaped Cake Pan Options
The foundation of any great heart cake is, of course, the pan itself. You have several options when it comes to heart shaped cake pans:
- Traditional metal heart shaped cake pans: These come in various sizes, typically 8-10 inches, and provide even baking. Look for ones with non-stick coating for easier release.
- Silicone heart molds: More flexible and generally easier for cake removal, though they might need extra support during baking.
- Adjustable cake molds: These clever contraptions let you create hearts of different sizes using the same equipment.
- DIY approach: No heart shaped cake pan? No problem! I’ll show you how to create a heart using round and square pans later.
Other Must-Have Tools
Beyond the pan itself, gather these items for a smooth baking experience:
- Parchment paper (for lining pans)
- Offset spatula (for smooth frosting application)
- Piping bags and tips (for decorative touches)
- Cake board or serving plate
- Cooling rack
- Serrated knife (for leveling cakes)
- Cake turntable (optional but helpful)
Selecting Your Perfect Heart Cake Recipe
The beauty of a heart cake is that virtually any cake recipe can work! The shape doesn’t dictate the flavor – your preference (or the recipient’s favorite) does. Here are some reliable options that I’ve found work exceptionally well:
Classic Vanilla Heart Cake
This versatile base pairs beautifully with nearly any filling or frosting:
Ingredients:
- 2½ cups all-purpose flour
- 2 cups granulated sugar
- 1 cup unsalted butter, softened
- 4 large eggs, room temperature
- 1 cup whole milk
- 2 teaspoons vanilla extract
- 2½ teaspoons baking powder
- ½ teaspoon salt
Method:
- Preheat your oven to 350°F (175°C) and prepare your heart shaped cake pan with butter and flour or parchment paper.
- Cream butter and sugar until light and fluffy, about 3-4 minutes.
- Add eggs one at a time, mixing well after each addition.
- Mix in vanilla extract.
- Combine dry ingredients in a separate bowl.
- Alternate adding dry ingredients and milk to the butter mixture, beginning and ending with dry ingredients.
- Pour batter into your prepared pan, smoothing the top with a spatula.
- Bake for 30-35 minutes or until a toothpick inserted comes out clean.
- Cool in the pan for 10 minutes before transferring to a cooling rack.
Rich Chocolate Heart Cake
For chocolate lovers, this decadent option never disappoints:
Ingredients:
- 2 cups all-purpose flour
- 2 cups granulated sugar
- ¾ cup unsweetened cocoa powder
- 2 teaspoons baking soda
- 1 teaspoon baking powder
- 1 teaspoon salt
- 2 large eggs
- 1 cup buttermilk
- ½ cup vegetable oil
- 2 teaspoons vanilla extract
- 1 cup hot coffee (enhances chocolate flavor)
Method:
- Preheat oven to 350°F (175°C) and prepare your heart shaped cake pan.
- Whisk together all dry ingredients in a large bowl.
- Add eggs, buttermilk, oil, and vanilla, beating on medium speed for about 2 minutes.
- Stir in hot coffee (batter will be thin, but that’s normal).
- Pour into prepared pan and bake for 30-35 minutes.
- Allow to cool completely before frosting.
Creating a Heart Cake Without a Specialized Pan
Don’t have a heart shaped cake pan? No worries! Here’s my foolproof method for creating a beautiful heart cake using pans you likely already own:
- Bake one 8-inch round cake and one 8-inch square cake using your favorite recipe.
- Once cooled, place the square cake on your work surface, positioned like a diamond (with corners pointing up, down, and to the sides).
- Cut the round cake in half.
- Position each half of the round cake against the top two sides of the diamond to form the rounded top of the heart.
- Trim any excess to perfect the shape.
- Use frosting to “glue” the pieces together before covering the entire cake with your final layer of frosting.
This method works beautifully and can actually be easier for beginners since you’re working with standard pans that may provide more reliable baking results.
Preparing and Baking Your Heart Cake for Perfect Results
Whether using a dedicated heart shaped cake pan or creating your own shape, these tips will help ensure baking success:
Proper Pan Preparation
The key to a clean release and beautiful heart cake is proper pan preparation:
- Start with a thorough greasing using butter or shortening, getting into all the corners and crevices.
- Dust with flour, tapping out excess, or use cocoa powder for chocolate cakes to avoid white residue.
- For extra insurance, cut parchment paper to fit the bottom of your heart shaped cake pan and place it after greasing.
Batter Distribution Tips
The way you distribute your batter affects how evenly your heart cake bakes:
- Pour batter into the center of the pan, then gently spread it toward the edges.
- Pay special attention to the pointed part of the heart – ensure batter reaches this area but isn’t overfilled.
- Tap the filled pan gently on the counter a few times to release air bubbles.
- Use a spatula to create a slight depression in the center of the batter (about ¼ inch) – this helps counteract the tendency of cakes to dome during baking.
Baking Temperature and Timing
Most cake recipes call for baking at 350°F (175°C), which works well for heart cakes too. However:
- Position your rack in the center of the oven for even heat distribution.
- Consider reducing the temperature to 325°F (165°C) and extending baking time slightly for more even baking.
- Resist opening the oven door during the first 20 minutes of baking to prevent temperature fluctuations.
- Start checking for doneness a few minutes before the recipe suggests – heart shaped cakes sometimes bake faster due to their shape.
Leveling, Filling, and Stacking Your Heart Cake
A perfectly level cake makes all the difference in presentation:
Creating Even Layers
- Once completely cooled, use a long serrated knife to level the top of your heart cake, cutting away any dome.
- For a multi-layer cake, slice your heart cake horizontally. The easiest method is using a cake leveler, but a long serrated knife works well too.
- Mark the halfway point around the sides of your cake with toothpicks as guides.
- Keep your knife parallel to your work surface as you slowly rotate the cake, cutting through it.
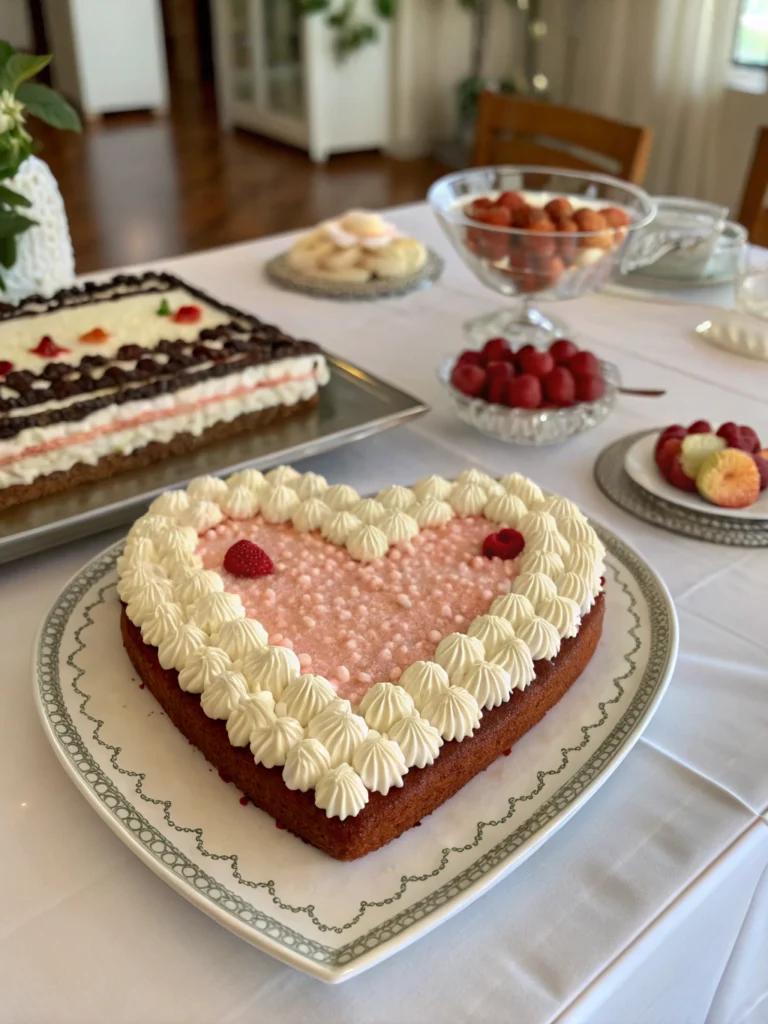
Delicious Filling Ideas
The filling between your heart cake layers adds flavor dimension and moisture:
- Classic buttercream: Never fails and provides stability
- Raspberry or strawberry preserves: Adds a fruity note that complements the heart theme
- Chocolate ganache: Rich and decadent for chocolate lovers
- Lemon curd: Bright and tangy contrast to sweet cake
- Cream cheese filling: Tangy-sweet and pipes beautifully
For the most stable heart cake, pipe a dam of buttercream around the edge of your cake layer before adding softer fillings in the center. This prevents filling from squeezing out when you add the top layer.
Frosting Techniques for a Beautiful Heart Cake
The frosting is your canvas for creativity:
Crumb Coat Essentials
Always start with a crumb coat – a thin layer of frosting that seals in crumbs:
- Apply a thin layer of frosting over the entire heart cake.
- Refrigerate for 15-20 minutes until the frosting firms up.
- This creates a clean base for your final decorative layer.
Smooth Frosting Application
For a sleek, professional look:
- Apply a generous layer of room-temperature frosting to your chilled crumb-coated heart cake.
- Use an offset spatula or bench scraper, held at a slight angle against the cake, to smooth the sides.
- Work around the cake, scraping excess frosting back into your bowl.
- For the top, hold your spatula flat and drag it across the surface from one edge to the other.
- The pointed bottom of the heart shaped cake can be tricky – use the tip of your offset spatula to carefully smooth this area.
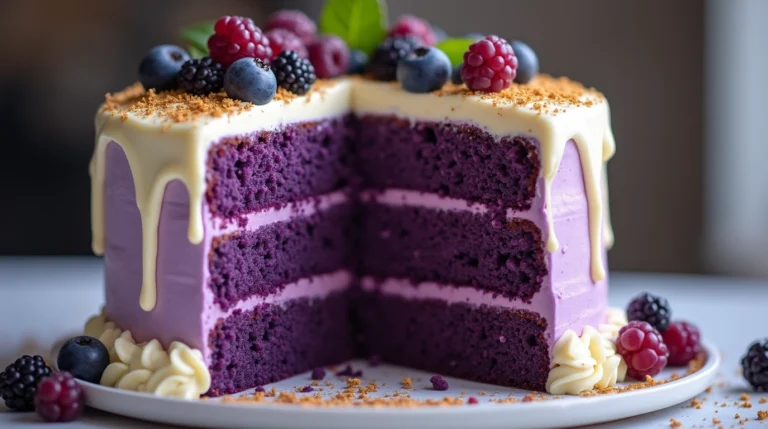
Creative Decoration Ideas for Your Heart Cake
Now for the fun part – making your heart cake truly special:
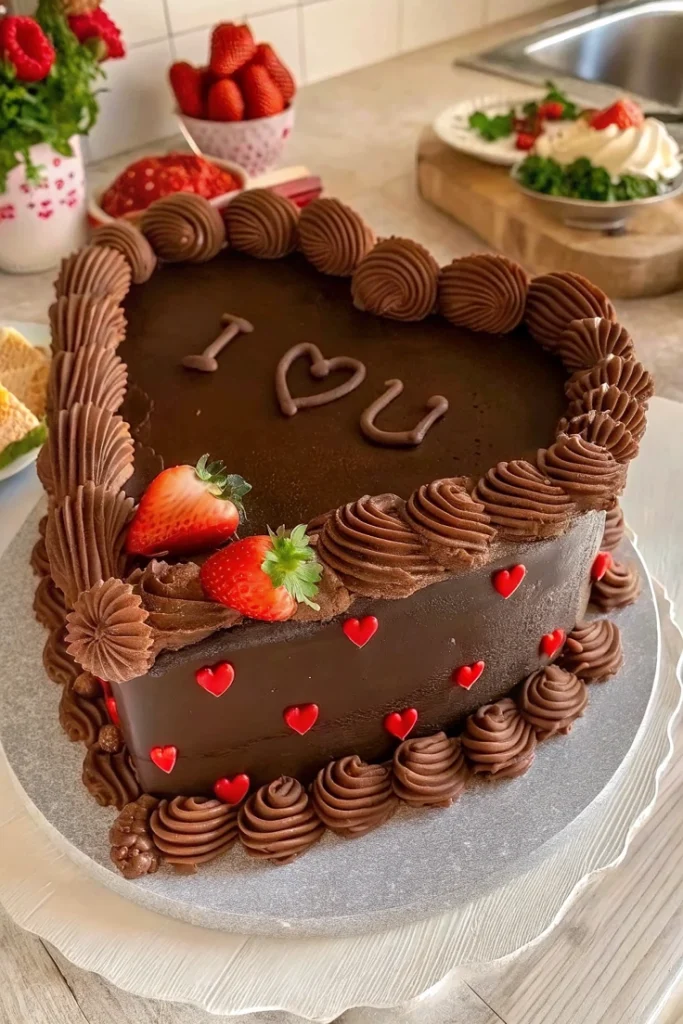
Valentine’s Day Heart Cake Inspirations
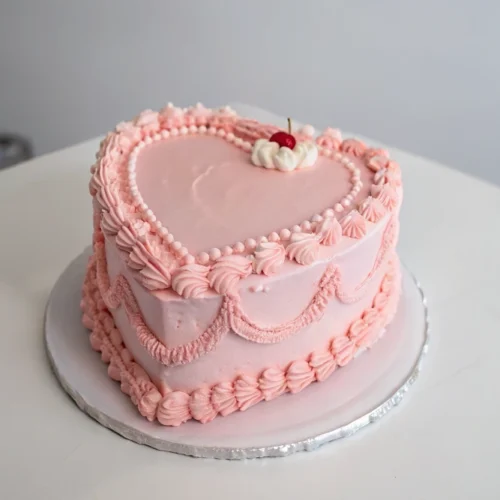
- Red and pink ombré frosting effect
- Chocolate ganache drip with fresh strawberries
- Conversation heart candies arranged artfully on top
- Piped buttercream roses in shades of pink and red
- Gold leaf accents for luxury appeal
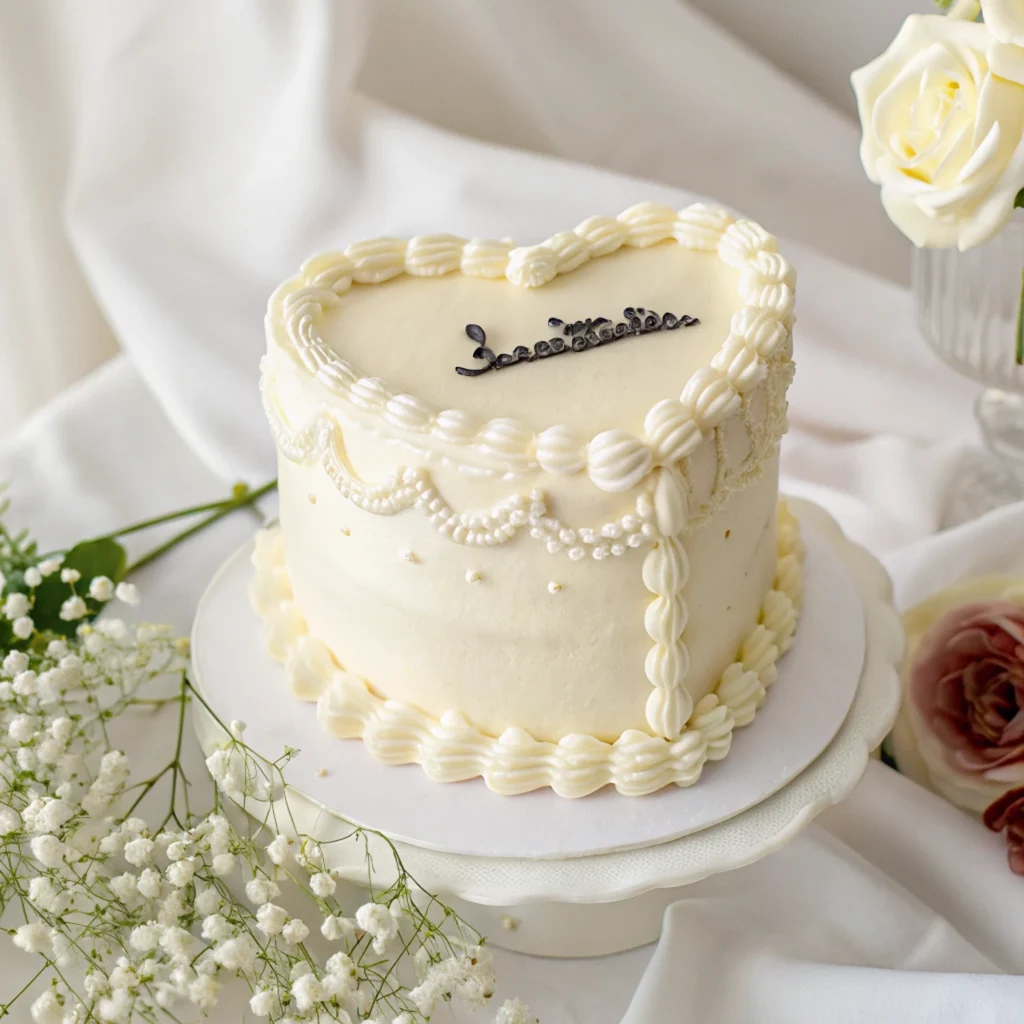
Anniversary Heart Cake Designs
- Elegant white-on-white with pearl sprinkles
- Custom-colored frosting to match wedding colors
- Fondant flowers that mirror the original wedding bouquet
- Monogrammed initials piped in contrasting frosting
- Simple naked cake style with fresh berries and flowers
Everyday “I Love You” Heart Cake Ideas
- Rustic textured buttercream with simple message
- Chocolate shavings creating a beautiful pattern
- Semi-naked style with visible cake layers peeking through
- Colorful sprinkle border with a simple center
- Marbled frosting effect using two complementary colors
Flavor Variations to Make Your Heart Cake Unforgettable
The classic vanilla or chocolate heart cake is wonderful, but consider these creative variations:
Seasonal Heart Cake Flavors
- Spring: Lemon cake with elderflower frosting
- Summer: Strawberry cake with fresh strawberry buttercream
- Fall: Spiced apple cake with caramel buttercream
- Winter: Peppermint chocolate cake with white chocolate frosting
Global-Inspired Heart Cake Flavors
- Italian: Tiramisu-inspired with coffee-soaked layers and mascarpone frosting
- Mexican: Tres leches-style heart cake with cinnamon-infused milk soak
- French: Lavender-vanilla cake with honey buttercream
- Japanese: Matcha green tea cake with white chocolate ganache
Storing and Transporting Your Heart Cake
After putting so much love into your heart cake, proper storage and transportation are essential:
Storage Tips
- Unfrosted heart cakes can be wrapped tightly in plastic wrap and stored at room temperature for 1-2 days.
- Frosted heart cakes should be stored in the refrigerator if they contain perishable fillings or frostings.
- Allow refrigerated heart cakes to come to room temperature before serving (usually 1-2 hours) for best flavor and texture.
- For longer storage, freeze unfrosted cake layers wrapped tightly in plastic wrap and aluminum foil for up to 2 months.
Transportation Strategies
Moving a heart cake safely requires planning:
- Chill your fully decorated heart cake for at least 2 hours before transport.
- Use a cake board slightly larger than your cake for support.
- For longer journeys, consider inserting dowels for structural support.
- Place the cake in a cake carrier or box that allows at least 1 inch of clearance on all sides.
- Keep the car cool and place the cake on a flat surface, ideally the floor where there’s less movement.
- Drive carefully, avoiding sudden stops and sharp turns.
Troubleshooting Common Heart Cake Challenges
Even experienced bakers encounter issues. Here’s how to solve them:
Problem: Cake Stuck in the Pan
Solution: Next time, be more generous with greasing and flouring, especially in the pointed part of the heart shaped cake pan. If your cake is stuck now, run a thin knife around the edges, then place a kitchen towel dampened with hot water on the bottom of the pan for a few minutes to loosen it.
Problem: Uneven Baking
Solution: Heart cakes can bake unevenly due to their shape. Try reducing oven temperature by 25°F and extending baking time. You can also wrap the outside of your heart shaped cake pan with damp cake strips to promote even baking.
Problem: Frosting Difficulties Around the Point
Solution: The pointed part of a heart cake is always the trickiest! Use a small offset spatula specifically for this area, and work from the point outward. Having extra frosting loaded on your spatula helps create smooth strokes.
Frequently Asked Questions About Heart Cakes
Q: Can I use a box mix for my heart cake?
A: Absolutely! Box mixes work wonderfully in heart shaped cake pans. Just prepare according to package directions and pay attention to the baking time, which might need slight adjustment.
Q: How far in advance can I make a heart cake?
A: You can bake the layers up to 3 days ahead and store tightly wrapped at room temperature, or freeze for up to 2 months. Completed heart cakes with frosting are best made no more than 2 days before serving.
Q: My heart shaped cake pan is silicone. Any special tips?
A: Silicone heart shaped cake pans should still be greased lightly. Place the flexible pan on a baking sheet before filling for stability. These pans often require slightly longer baking times, so check with a toothpick for doneness.
Q: Can I convert any regular cake recipe into a heart cake?
A: Yes! The heart shape doesn’t change the recipe, just potentially the baking time. Most 8-inch or 9-inch round cake recipes work perfectly in a standard heart shaped cake pan.
Q: What’s the best way to write on a heart cake?
A: Chill your frosted heart cake first. Then use a small round piping tip with contrasting frosting or melted chocolate in a piping bag. Practice your message on parchment paper first, and remember that simple messages work best.
Show Me Your Heart Cake Creations!
I hope this guide has inspired you to create your own beautiful heart cake! Remember, the most important ingredient is the love you put into making it. The heart shape is just a bonus that makes your intention visible.
Have you made a heart cake using these tips? I’d love to see your creations! Share your photos in the comments below or tag me on social media. And if you encountered any challenges or have questions, let me know – I’m here to help make your heart cake dreams come true.
For more themed cake ideas and baking inspiration, check out my other cake tutorials and recipes. Happy baking, and remember – nothing says “I love you” quite like a homemade heart cake!
Hungry for more? Check out our top rated recipes :
- How to Make a Crumbl Cookie Recipe at Home:Best Recipes of 2025
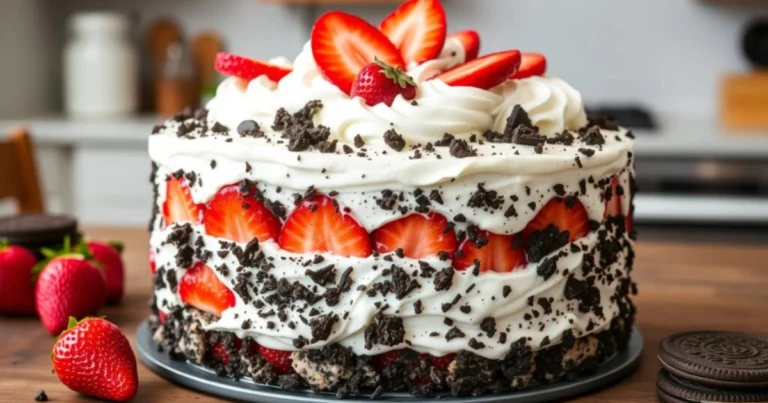
- Strawberry Oreo Crunch Cake: A Delicious Twist on a Classic
- No Sugar Chocolate: How to Make the Best Sugar-Free Chocolate at Home
- How to Make Irresistible Chocolate Covered Potato Chips at Home
Heart-Shaped Cake
Ingredients
- 2½ cups all-purpose flour
- 2 tsp baking powder
- 1 cup unsalted butter softened
- 1½ cups granulated sugar
- 4 eggs
- 1 cup milk
- 2 tsp vanilla extract
- Pinch of salt
- Frosting: Buttercream 2 cups powdered sugar, 1 cup butter, vanilla or fondant
Instructions
- Preheat oven to 350°F (175°C). Grease heart-shaped pan.
- Whisk dry ingredients: flour, baking powder, salt.
- Cream butter and sugar; add eggs and vanilla.
- Alternate mixing dry ingredients and milk into wet mixture.
- Pour batter into pan; bake 25–30 minutes. Cool completely.
- Decorate with frosting, sprinkles, or fresh fruit.
Notes
- Use strawberry reduction for a pink hue or add cocoa powder for chocolate variation.
- No heart pan? Bake two round cakes, cut one into a triangle, and attach to the other to form a heart.
- Decorate with edible glitter or chocolate shavings for extra flair.