Table of Contents
Why Mini Cakes Have Captured My Heart (And Will Capture Yours Too!)
There’s something undeniably magical about mini cakes. These pint-sized delights deliver all the joy of their full-sized counterparts but with added charm and versatility. I fell in love with mini cakes years ago when hosting a garden party where I wanted everyone to have their own special dessert without committing to massive portions.
Mini cakes are the perfect canvas for creativity. Whether you’re baking in mini bundt cake pans for elegant swirled designs, crafting layered beauties with buttercream, or experimenting with unique flavors, these petite treats offer endless possibilities. Plus, they bake faster than regular cakes, which means less waiting time between mixing and that first heavenly bite!
For beginners, mini cakes provide the perfect entry point into cake baking. The smaller size means less intimidation and more room for experimentation. For seasoned bakers, they offer a chance to test new flavor combinations without committing to a full-sized cake. Let’s dive into the wonderful world of these adorable desserts that prove good things really do come in small packages!
Essential Equipment for Perfect Mini Cakes
Before we jump into recipes, let’s talk about the tools that will set you up for mini cake success:
Mini Cake Pans: Your Foundation
The right pan makes all the difference when creating mini cakes. Here are your main options:
Mini bundt cake pans: These create those beautiful ridged designs that need minimal decoration. A standard mini bundt pan typically holds about 1 cup of batter per cavity. Look for pans with non-stick coating for easy release.
Mini round cake pans: Perfect for creating layered mini cakes. These typically come in 4-inch or 6-inch diameters.
Cupcake tins: Yes, your standard muffin tin works beautifully for mini cakes! Fill them about halfway for flat-topped mini cakes.
Mini loaf pans: Create adorable rectangular mini cakes perfect for gifting.
Other Essential Tools
- Piping bags and tips: For decorating with precision
- Small offset spatula: Helps with smooth frosting application
- Cooling rack: Ensures your mini cakes cool properly
- Cake tester or toothpick: Essential for checking doneness
- Kitchen scale: For precise measurements (especially important with mini cakes!)
I’ve found investing in quality mini bundt cake pans particularly worthwhile. The intricate designs do half the decorating work for you, and a simple glaze or dusting of powdered sugar is all you need for a stunning presentation.
Classic Vanilla Mini Cakes: Your Perfect Foundation
Every mini cake journey should begin with a reliable vanilla recipe. This versatile base can be adapted countless ways once you’ve mastered it.
Ingredients
For the mini cakes:
- 1½ cups all-purpose flour
- 1½ teaspoons baking powder
- ¼ teaspoon salt
- ½ cup unsalted butter, softened
- 1 cup granulated sugar
- 2 large eggs, room temperature
- 2 teaspoons pure vanilla extract
- ½ cup whole milk, room temperature
For the vanilla glaze:
- 1 cup powdered sugar
- 2-3 tablespoons milk
- ½ teaspoon vanilla extract
Instructions
Prep your workspace: Preheat your oven to 350°F (175°C). Generously grease your mini cake pans. If using mini bundt cake pans, be extra thorough, getting into all the nooks and crannies.
Mix dry ingredients: In a medium bowl, whisk together the flour, baking powder, and salt. Set aside.
Cream butter and sugar: In a large bowl, beat the softened butter and sugar until light and fluffy, about 3-4 minutes. Don’t rush this step! The air you incorporate here helps create that tender crumb we’re looking for.
Add wet ingredients: Beat in the eggs one at a time, then stir in the vanilla extract. The mixture might look slightly curdled—that’s perfectly normal!
Combine wet and dry: Gradually add the flour mixture to the butter mixture, alternating with milk, beginning and ending with flour. Mix just until combined after each addition. Over-mixing is the enemy of tender mini cakes!
Fill the pans: Spoon the batter into your prepared pans, filling each cavity about 2/3 full. A cookie scoop works wonders for even portioning.
Bake to perfection: Bake for 15-20 minutes, or until a toothpick inserted in the center comes out clean. Mini cakes bake much faster than regular cakes, so start checking early!
Cool properly: Allow the mini cakes to cool in the pans for 10 minutes before turning them out onto a wire rack to cool completely.
Glaze: Whisk together the powdered sugar, milk, and vanilla until smooth. Drizzle over cooled mini cakes.
One batch typically yields 12-16 mini cakes, depending on your pan size. These vanilla mini cakes store beautifully at room temperature in an airtight container for up to 3 days.
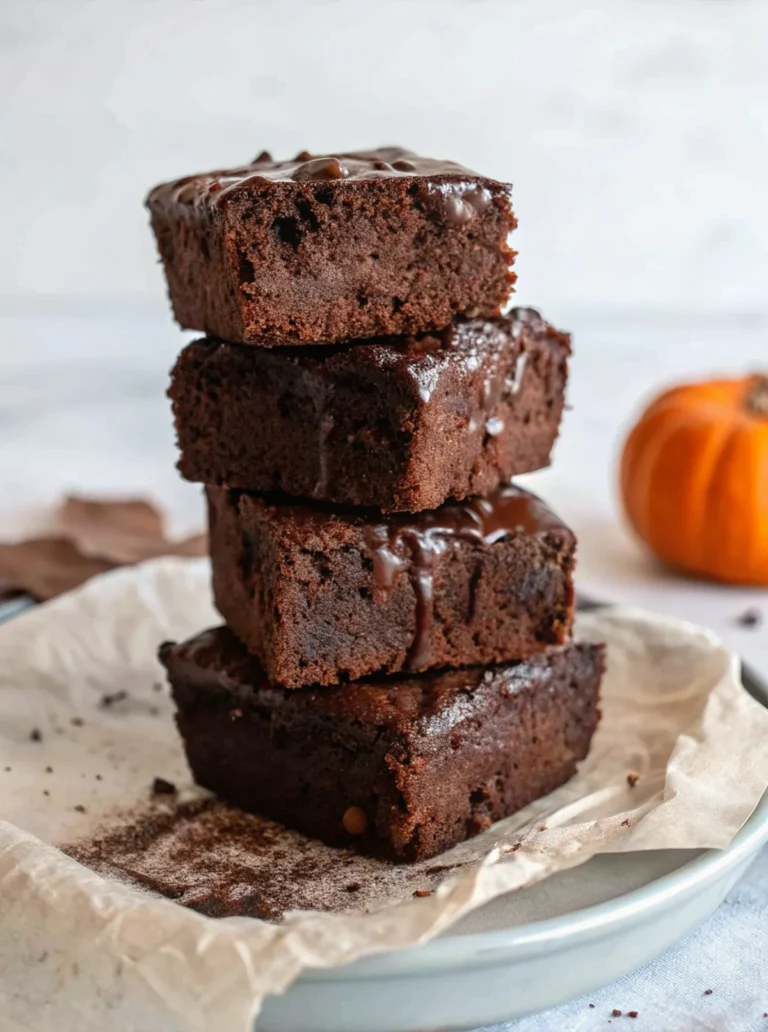
Decadent Chocolate Mini Cakes
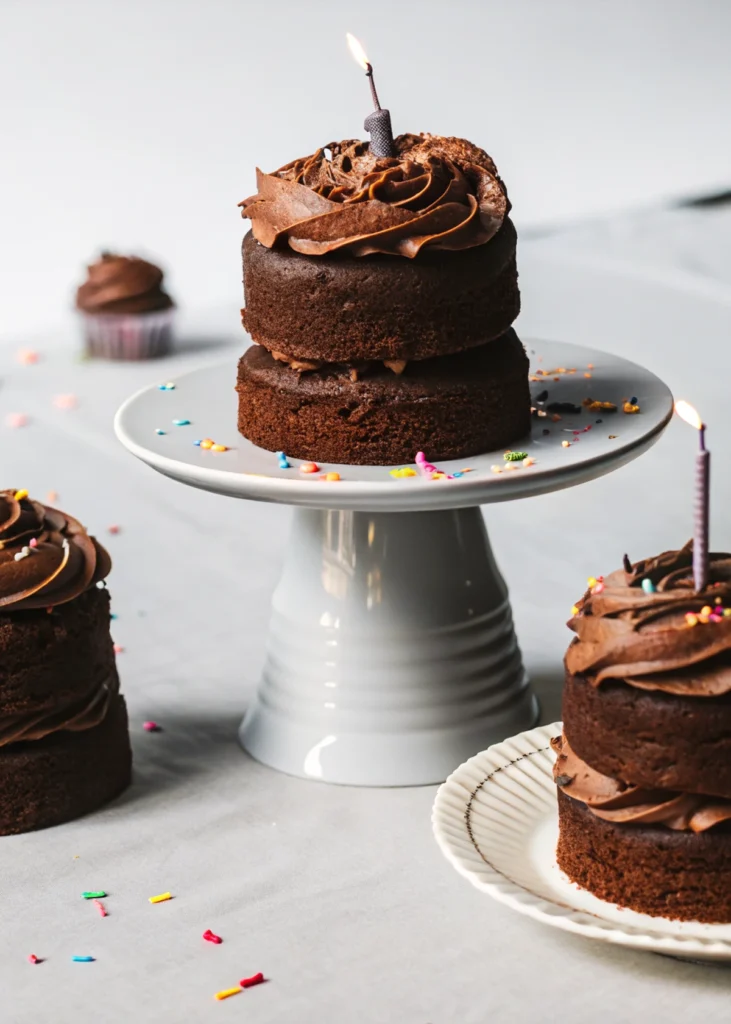
When chocolate cravings strike, these mini cakes deliver rich, intense flavor in the perfect portion-controlled package.
Ingredients
For the mini cakes:
- 1 cup all-purpose flour
- ½ cup unsweetened cocoa powder
- 1 teaspoon baking powder
- ½ teaspoon baking soda
- ¼ teaspoon salt
- ½ cup unsalted butter, softened
- 1 cup granulated sugar
- 2 large eggs, room temperature
- 1 teaspoon vanilla extract
- ½ cup buttermilk
- ½ cup hot coffee (enhances chocolate flavor!)
For the ganache topping:
- 4 ounces dark chocolate, chopped
- ½ cup heavy cream
Instructions
Prepare your oven and pans: Preheat to 350°F (175°C) and thoroughly grease your mini cake pans.
Mix dry ingredients: Sift together flour, cocoa powder, baking powder, baking soda, and salt. Sifting is especially important with cocoa powder to avoid lumps!
Cream butter and sugar: Beat butter and sugar until light and fluffy, about 3 minutes.
Add eggs and vanilla: Beat in eggs one at a time, then stir in vanilla.
Alternate wet and dry: Gradually add the flour mixture alternating with buttermilk, beginning and ending with flour. Mix until just combined.
Add coffee: Stir in hot coffee. The batter will be thin—don’t worry, that’s exactly right!
Bake: Fill mini cake pans about 2/3 full and bake for 15-18 minutes, until a toothpick comes out with a few moist crumbs.
Make ganache: While cakes cool, heat heavy cream until just simmering. Pour over chopped chocolate and let sit for 2 minutes. Stir until smooth.
Finish: Dip the tops of cooled mini cakes into the ganache or spoon it over the top. Add sprinkles or a raspberry for an extra-special touch.
These chocolate mini cakes are particularly stunning when baked in mini bundt cake pans, where the ganache can drip enticingly down the ridges. They’re rich enough that one satisfies, but small enough that you won’t feel guilty going back for seconds!
Fruity Mini Bundt Cakes for Spring and Summer
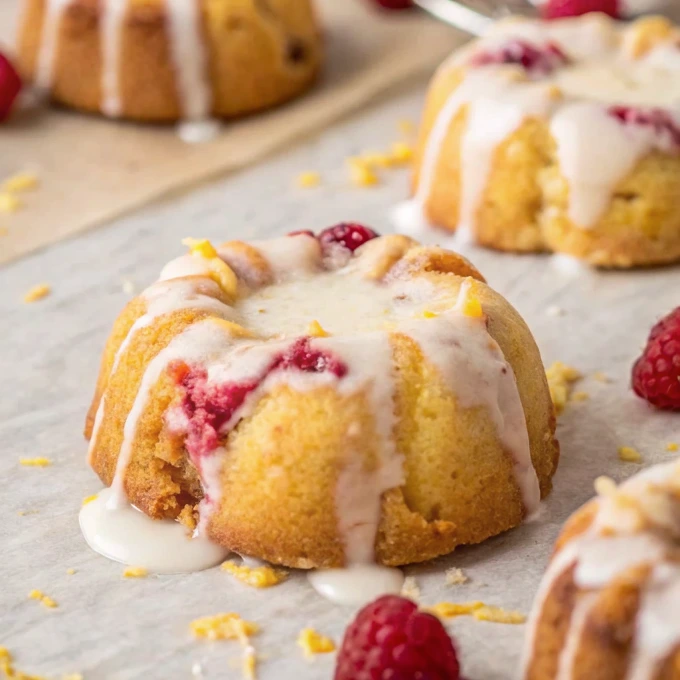
When berries are at their peak, these mini bundt cakes showcase their vibrant flavors beautifully.
Ingredients
For the mini cakes:
- 1½ cups all-purpose flour
- 1½ teaspoons baking powder
- ¼ teaspoon salt
- ½ cup unsalted butter, softened
- 1 cup granulated sugar
- Zest of 1 lemon
- 2 large eggs, room temperature
- 1 teaspoon vanilla extract
- ½ cup milk
- 1 cup fresh berries (blueberries, raspberries, or diced strawberries)
For the lemon glaze:
- 1 cup powdered sugar
- 2 tablespoons fresh lemon juice
- 1 teaspoon lemon zest
Instructions
Prep work: Preheat oven to 350°F (175°C). Thoroughly grease your mini bundt cake pan.
Mix dry ingredients: Whisk together flour, baking powder, and salt.
Infuse flavor: In a large bowl, rub the lemon zest into the sugar with your fingertips. This releases the oils and creates an amazing aromatic base.
Cream butter and sugar: Beat the butter and lemon sugar until light and fluffy.
Add eggs and vanilla: Beat in eggs one at a time, then stir in vanilla.
Alternate wet and dry: Add flour mixture and milk alternately, beginning and ending with flour.
Fold in berries: Gently fold in berries, being careful not to crush them.
Bake: Fill mini bundt cake pan cavities about 2/3 full and bake for 15-20 minutes.
Make glaze: Whisk together powdered sugar, lemon juice, and zest until smooth.
Finish: When cakes are completely cool, drizzle with lemon glaze.
The mini bundt cake pan creates gorgeous ridges that catch the glaze perfectly. For an extra special touch, place a fresh berry in the center of each mini cake before serving. These bright, zesty cakes are perfect for brunches, baby showers, or anytime you need a taste of sunshine!
Creative Mini Cake Variations and Flavor Combinations
The beauty of mini cakes is how easily you can experiment with different flavors. Here are some of my favorite variations:
Spiced Mini Cakes
Add warmth to your mini cakes with these spice combinations:
- Chai Spice: Add 1 teaspoon cinnamon, ½ teaspoon ginger, ¼ teaspoon cardamom, and a pinch of cloves to the vanilla base recipe
- Pumpkin Spice: Replace ¼ cup of butter with ¼ cup pumpkin puree and add 1½ teaspoons pumpkin pie spice
- Gingerbread: Add 1 tablespoon molasses, 1 teaspoon cinnamon, ½ teaspoon ginger, and ¼ teaspoon nutmeg
Fun Fusion Flavors
- Cookies and Cream Mini Cakes: Fold 1 cup crushed chocolate sandwich cookies into the vanilla batter
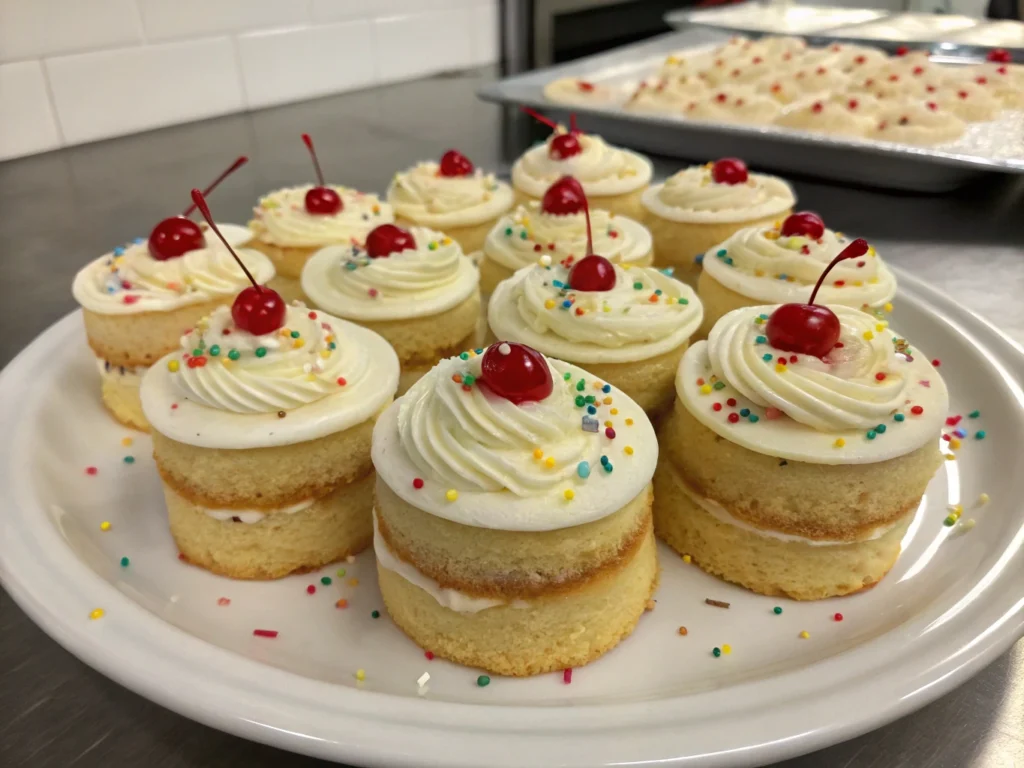
- Birthday Cake Mini Bundt Cakes: Add ½ cup rainbow sprinkles to the vanilla batter and top with more sprinkles after glazing
- Lemon Poppyseed: Add 2 tablespoons poppyseeds and the zest of 2 lemons to the vanilla base
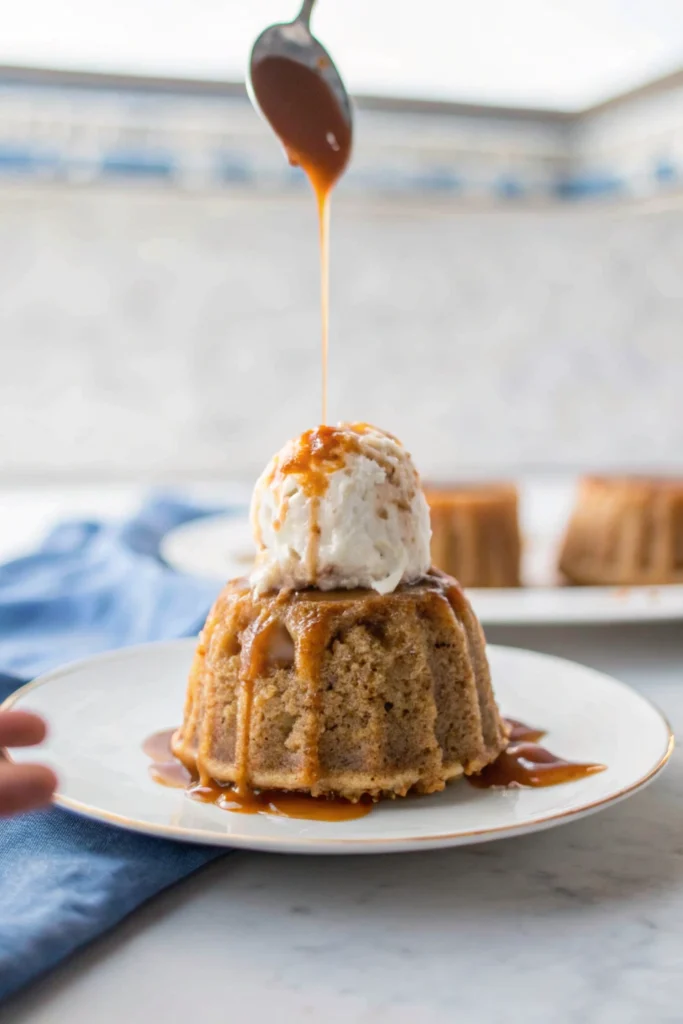
- Coffee Caramel: Add 1 tablespoon instant espresso powder to the vanilla base and drizzle with caramel sauce instead of glaze
Inspired by Favorite Desserts
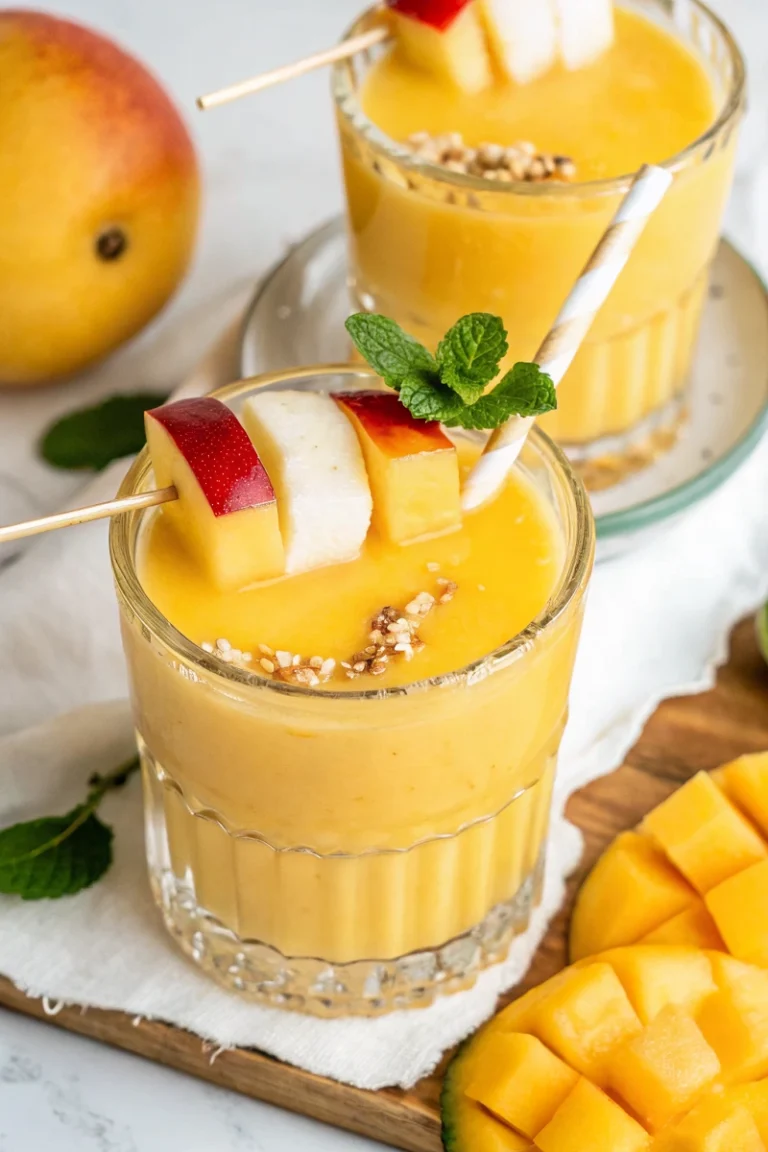
- Key Lime Pie Mini Cakes: Add 3 tablespoons lime juice and 1 tablespoon lime zest to the vanilla base; top with whipped cream
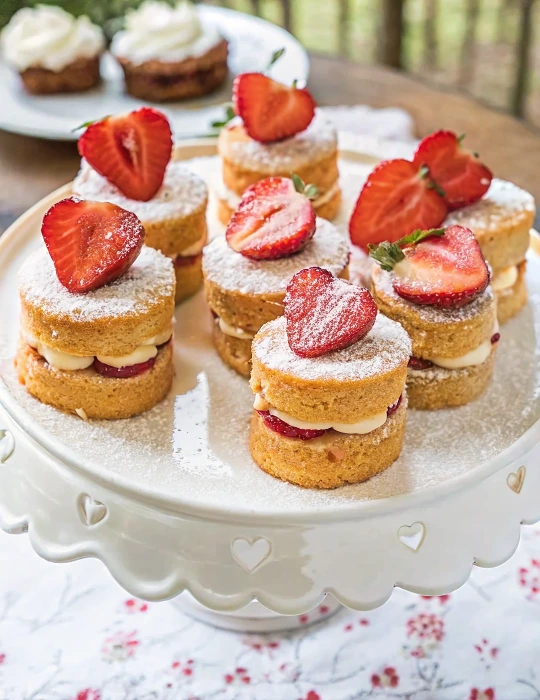
- Strawberry Shortcake Mini Cakes: Split vanilla mini cakes horizontally, fill with macerated strawberries and whipped cream
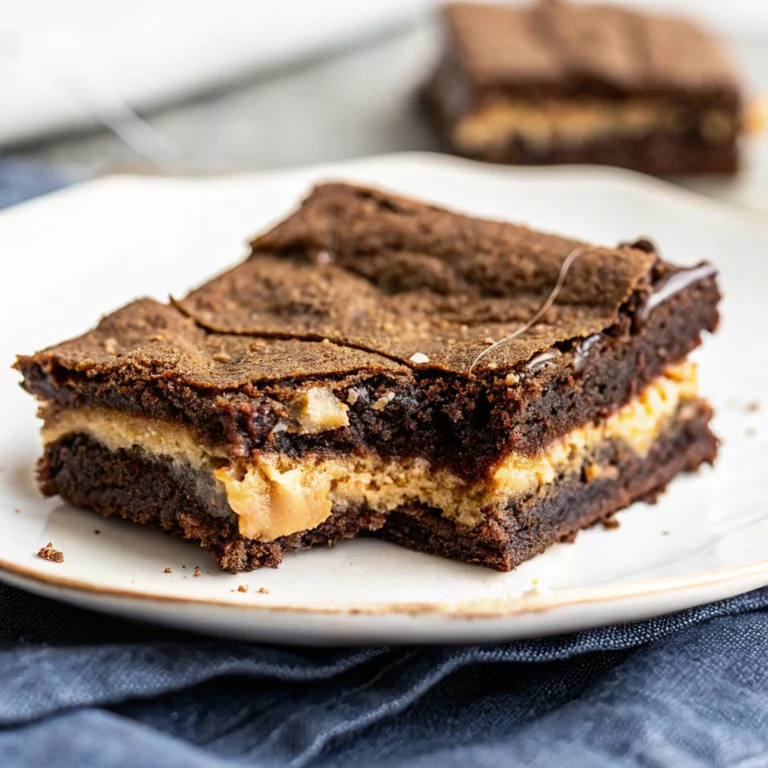
- S’mores Mini Cakes: Add graham cracker crumbs to the batter, top with chocolate ganache and toasted marshmallow frosting
When experimenting with your own flavor combinations, remember that mini cakes are forgiving! Even if a flavor experiment doesn’t turn out perfectly, you haven’t wasted a large amount of ingredients, making them perfect for culinary adventures.
Decorating Tips for Show-Stopping Mini Cakes
The small canvas of mini cakes makes decorating both fun and manageable, even for beginners!
Simple Yet Stunning Ideas
- Powdered Sugar: Dust mini bundt cakes with powdered sugar through a fine-mesh sieve for an elegant, no-fuss finish
- Glazes: A simple glaze creates a professional look, especially on mini bundt cakes where it highlights the ridges
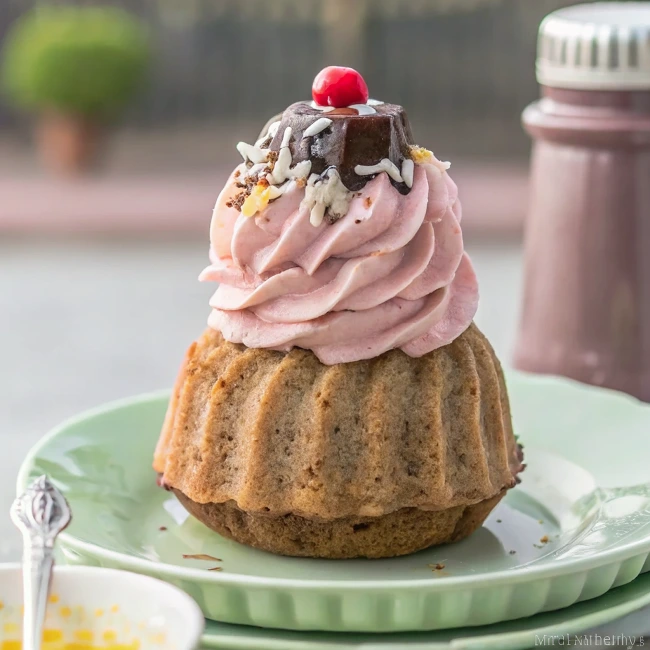
- Fresh Fruit: Top with a single raspberry, strawberry half, or blueberries for a pop of color
- Edible Flowers: Candied violets or fresh edible flowers make mini cakes look straight out of a fairy tale
- Chocolate Shards: Place a small shard of chocolate at an angle for instant sophistication
For Special Occasions
- Mini Wedding Cakes: Stack two mini cakes with buttercream between, frost the outside, and decorate with tiny sugar flowers
- Holiday Mini Cakes: Use themed sprinkles, colored glazes, or small fondant decorations for seasonal celebrations
- Birthday Mini Bundt Cakes: Place a single candle in the center of each mini bundt cake for a personalized birthday dessert
Professional-Looking Finishes
- Mirror Glaze: For truly show-stopping mini cakes, try a mirror glaze for a glossy, reflective finish
- Texture: Use a fork to create patterns in glazes before they set
- Drips: Let chocolate or caramel sauce drip artfully down the sides
- Piping: Even simple piped dots or rosettes look impressive on mini cakes
Remember that with mini cakes, less is often more! A single perfect decoration can have more impact than multiple competing elements.
Troubleshooting Common Mini Cake Problems
Even experienced bakers sometimes run into issues with mini cakes. Here are solutions to the most common problems:
Mini Cakes Sticking to the Pan
Problem: Your mini cakes won’t release from the pan, especially frustrating with detailed mini bundt cake pans.
Solutions:
- Be extremely thorough when greasing, using a pastry brush to get into all crevices
- Try a baking spray that contains flour
- Allow cakes to cool for exactly 10 minutes before turning out—too short and they’ll break, too long and they’ll stick
- Gently tap the pan on the counter before attempting to release
Uneven Baking
Problem: Some mini cakes are done while others are still raw in the center.
Solutions:
- Rotate pans halfway through baking
- Ensure your oven temperature is accurate with an oven thermometer
- Don’t overcrowd the oven; bake in batches if necessary
- Fill all cavities with the same amount of batter (a cookie scoop helps with this)
Sunken Centers
Problem: Your mini cakes cave in the middle after baking.
Solutions:
- Avoid opening the oven door during the first half of baking
- Check that your leavening agents are fresh
- Make sure you’re not overmixing the batter
- Ensure you’re using the right amount of batter per cavity (typically 2/3 full)
Dry Mini Cakes
Problem: Your mini cakes turn out dry and crumbly.
Solutions:
- Be careful not to overbake—mini cakes need less time than you might think
- Add a tablespoon of sour cream or yogurt to the batter for moisture
- Store properly in airtight containers
- Brush with simple syrup after baking for extra moisture
With a little troubleshooting, you’ll be creating perfect mini cakes every time!
Serving and Storing Your Mini Cakes
One of the joys of mini cakes is their versatility in serving and their ability to stay fresh when stored properly.
Creative Serving Ideas
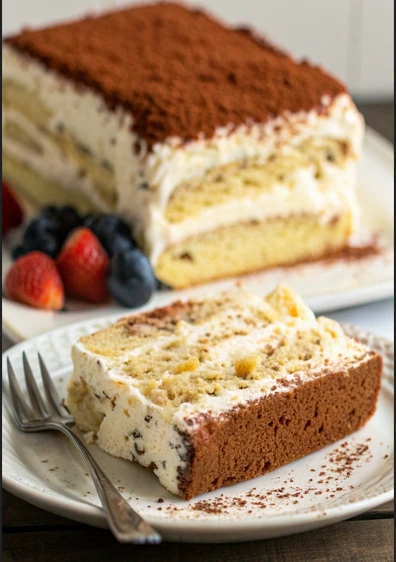
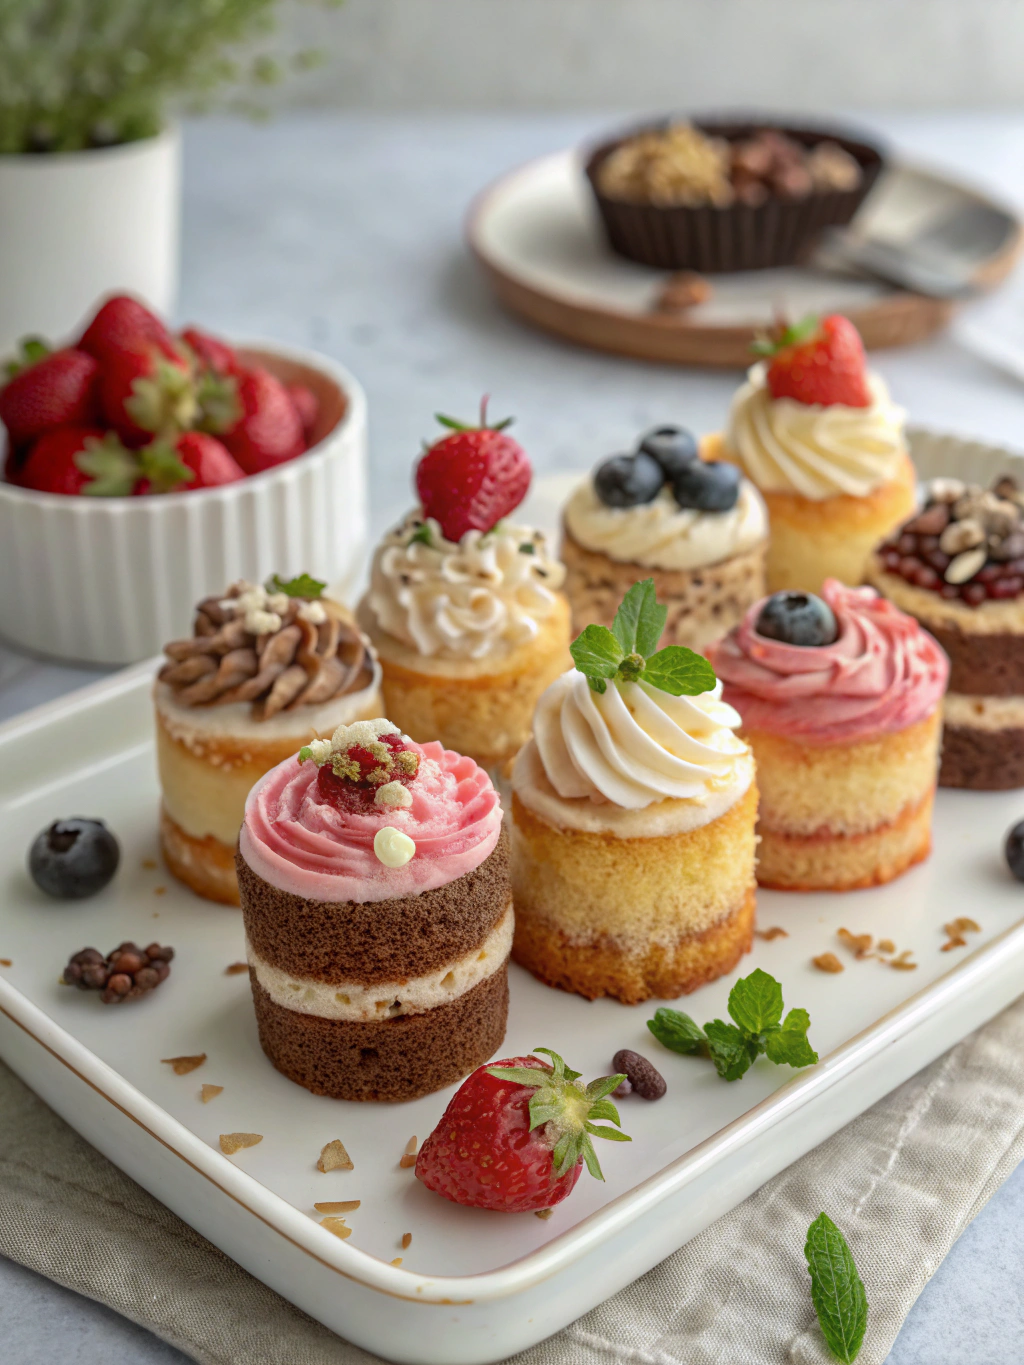
- Dessert Board: Arrange various mini cakes on a large platter with fresh berries, chocolate pieces, and edible flowers for a stunning dessert grazing board
- Individual Place Settings: Place a mini cake at each dinner guest’s place for a personalized touch
- Tiered Display: Arrange mini cakes on a tiered stand for an impressive
Conclusion: Small Cakes, Big Delights
Mini cakes are more than just desserts—they’re tiny celebrations of creativity, flavor, and joy. Whether you’re hosting an intimate gathering, surprising a loved one with a personalized treat, or simply indulging in a moment of sweetness, these petite delights deliver big on satisfaction. Their versatility makes them perfect for any occasion, from elegant soirées (hello, mini bundt cakes with glossy glazes!) to casual weeknight treats (looking at you, chocolate ganache-dipped bites).
The beauty of mini cakes lies in their ability to balance simplicity and sophistication. Beginners can master them with ease, while seasoned bakers can push boundaries with bold flavors and intricate designs. Plus, their portion-friendly size means you can savor a little luxury without overcommitment. So grab your mini cake pans, unleash your inner artist, and let these charming creations transform your baking routine. Trust me—once you go mini, you’ll never look back!
FAQs: Your Mini Cake Questions, Answered
- Can I use regular cake recipes for mini cakes?
Absolutely! Adjust baking times (typically 15–25 minutes at 350°F/175°C) and fill pans ⅔ full. Use a kitchen scale to divide batter evenly. - How do I prevent mini bundt cakes from sticking?
Grease pans thoroughly with baking spray or butter, ensuring every crevice is coated. Let cakes cool for 10 minutes before gently tapping them out. - How long do mini cakes stay fresh?
Store in an airtight container at room temperature for up to 3 days, or refrigerate for 5 days. For longer storage, freeze unfrosted cakes for up to 3 months. - Can I make mini cakes gluten-free or vegan?
Yes! Substitute gluten-free flour 1:1, or use vegan butter, flax eggs, and plant-based milk. Adjust leavening agents if needed. - What’s the easiest way to transport mini cakes?
Use a cupcake carrier or sturdy tray with compartments. Chill frosted cakes first to set decorations, and cushion layers with parchment paper. - How do I keep mini cakes moist?
Avoid overbaking, brush cooled cakes with simple syrup, or add a tablespoon of sour cream/yogurt to the batter. - What’s the best frosting for beginners?
Start with a simple glaze (powdered sugar + milk) or whipped cream. Piping swirls with store-bought frosting works too! - Can I bake mini cakes without specialty pans?
Yes! Use a muffin tin for round cakes, or bake a sheet cake and cut out small rounds with a cookie cutter.
Hungry for more? Check out our top rated recipes :