Table of Contents
The Magic of No Bake Oreo Cheesecake
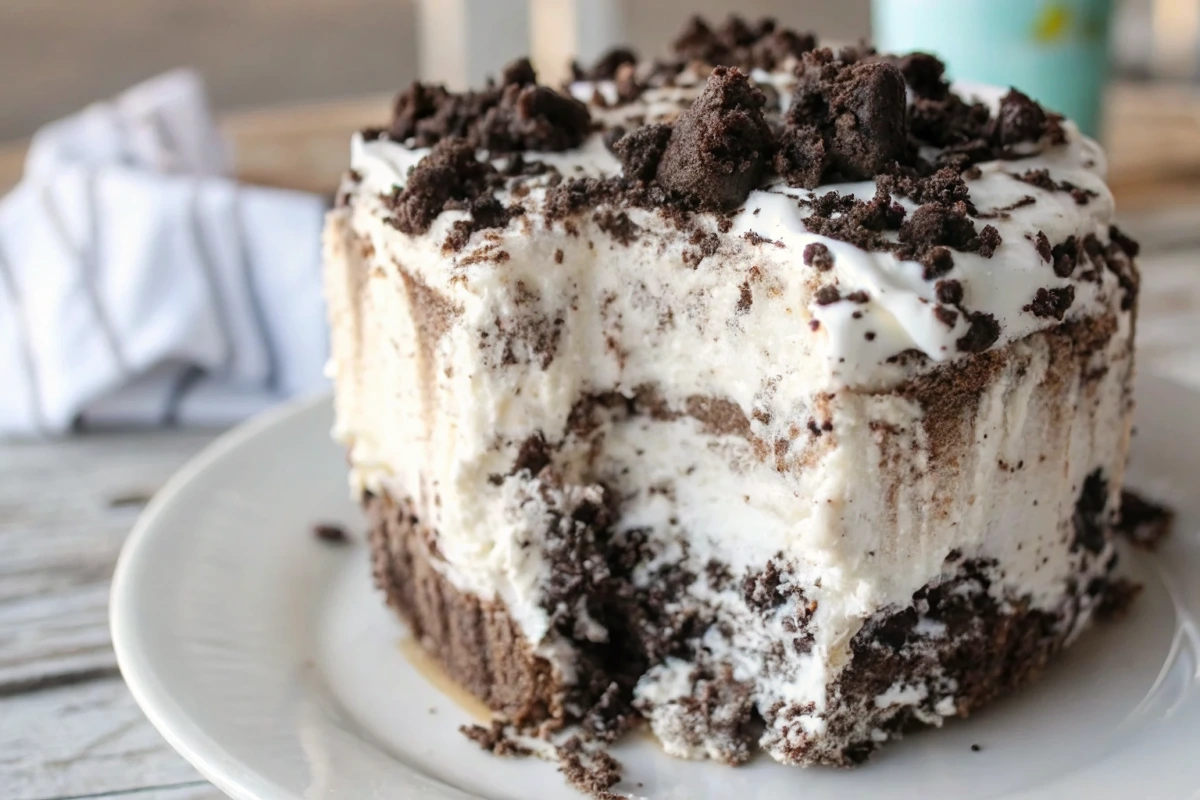
There’s something magical about the combination of creamy cheesecake and crunchy Oreo cookies. When these two dessert powerhouses come together—without requiring any baking—it’s a match made in heaven! This no bake Oreo cheesecake has been my go-to dessert for over a decade, whether I’m hosting summer barbecues (when turning on the oven feels criminal) or needing a quick but impressive treat for unexpected guests.
What makes this particular no bake Oreo cheesecake recipe special is the perfect balance of textures: a sturdy Oreo crust that holds its shape when sliced, a velvety smooth filling studded with cookie chunks, and a topping that makes everyone reach for their phones to snap a picture before diving in.
Trust me when I say this dessert has converted even the most dedicated “traditional baked cheesecake” fans in my family. Let’s get started on creating this crowd-pleaser!
Ingredients You’ll Need
The beauty of this no bake Oreo cheesecake recipe lies in its simplicity. You’ll need just a handful of ingredients that you probably already have in your kitchen:
For the Oreo Crust:
- 24 Oreo cookies (about 2 cups when crushed)
- 5 tablespoons unsalted butter, melted
- Pinch of salt
For the Cheesecake Filling:
- 16 ounces (2 blocks) cream cheese, softened to room temperature
- 1 cup powdered sugar
- 1 teaspoon vanilla extract
- 1/2 teaspoon salt
- 1 1/2 cups heavy whipping cream
- 12 Oreo cookies, roughly chopped
- 2 tablespoons powdered sugar (for the whipped cream)
For the Topping:
- 1/2 cup heavy whipping cream
- 2 tablespoons powdered sugar
- 8 Oreo cookies (some halved, some crushed)
- Chocolate sauce for drizzling (optional)
Essential Equipment
Don’t worry, this cheesecake no bake Oreo creation doesn’t require fancy tools:
- 9-inch springform pan
- Parchment paper (for easy removal)
- Food processor or zip-top bag with rolling pin (for crushing cookies)
- Electric mixer (stand or hand mixer)
- Spatula
- Measuring cups and spoons
Making the Perfect Oreo Crust
The foundation of any great no bake Oreo cheesecake is a perfect crust that holds together when sliced. Here’s how to nail it every time:
Prepare your pan: Line the bottom of your springform pan with parchment paper and lightly grease the sides with butter or cooking spray.
Crush those cookies: Place 24 whole Oreos (cream filling and all!) in your food processor and pulse until you have fine crumbs. No food processor? No problem! Place cookies in a sealed zip-top bag and crush with a rolling pin. The texture should be like wet sand when you’re done.
Mix in the butter: Transfer the crumbs to a bowl, add the melted butter and salt, then stir until every crumb is moistened. The mixture should hold together when pressed between your fingers.
Form the crust: Pour the mixture into your prepared pan and press firmly and evenly across the bottom and about 1 inch up the sides. I find using the bottom of a measuring cup creates the most even pressure.
Chill to set: Pop the crust in the refrigerator for at least 20 minutes while you prepare the filling. This helps it firm up and maintain its shape.
Pro Tip:
For an extra-sturdy crust that slices beautifully, place the prepared crust in the freezer for 10 minutes instead of the refrigerator. This quick-chill method has saved many of my summer desserts from crumbling during serving!
Creating the Creamy Filling
The heart of any no bake Oreo cheesecake is its luscious filling. Here’s how to make it perfectly smooth with just the right amount of Oreo chunks:
Beat the cream cheese: In a large bowl, beat the softened cream cheese until completely smooth with no lumps, about 2 minutes. This step is crucial for a silky texture, so don’t rush it!
Add sweetness and flavor: Mix in the powdered sugar, vanilla extract, and salt until well combined. The mixture should be smooth and slightly fluffy.
Prepare the whipped cream: In a separate bowl, whip the heavy cream and 2 tablespoons powdered sugar until stiff peaks form. This will give your cheesecake its lightness and structure.
Combine gently: Fold the whipped cream into the cream cheese mixture with a spatula, using a gentle hand to maintain as much air as possible. Start with about 1/3 of the whipped cream to lighten the mixture, then fold in the remainder.
Add the Oreo magic: Roughly chop 12 Oreo cookies into chunks (I like pieces about 1/4 inch) and gently fold them into the cheesecake mixture. These cookie pieces create that signature Oreo cheesecake experience with bits of cookie in every bite!
Filling and Chilling Your Cheesecake
Transfer to the crust: Pour the prepared filling into your chilled Oreo crust and smooth the top with a spatula or the back of a spoon.
Chill thoroughly: Cover the pan with plastic wrap and refrigerate for at least 6 hours, preferably overnight. This waiting time is non-negotiable for a perfectly set no bake Oreo cheesecake!
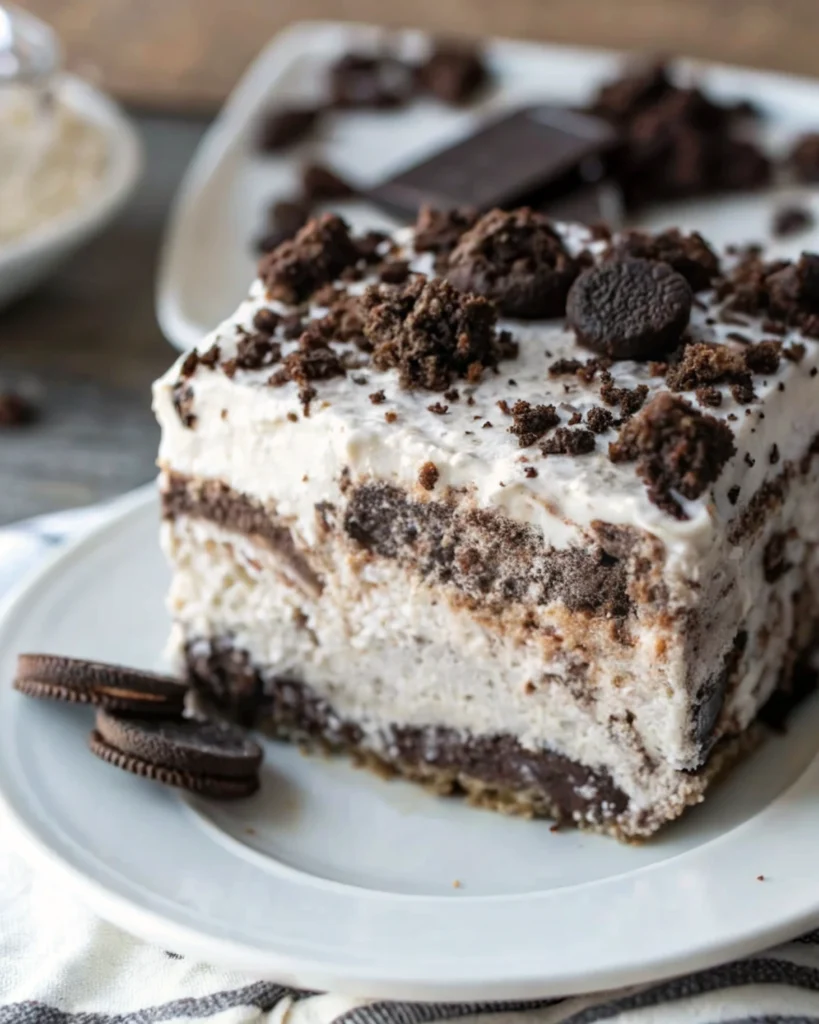
Topping Your Masterpiece
The finishing touches make this cheesecake no bake Oreo dessert truly Instagram-worthy:
Prepare whipped cream: Whip 1/2 cup heavy cream with 2 tablespoons powdered sugar until stiff peaks form.
Decorate with style: You can either spread the whipped cream over the entire cheesecake or pipe decorative swirls around the edge. I like to use a large star tip for professional-looking swirls.
Add Oreo garnishes: Arrange halved Oreos around the edge of the cheesecake, sprinkle crushed Oreos over the center, or create your own pattern. There’s no wrong way to add more Oreos!
Drizzle with chocolate: For extra decadence, drizzle chocolate sauce over the top just before serving.
Storage Tips for No Bake Oreo Cheesecake
This no bake Oreo cheesecake recipe yields a dessert that actually improves after a day in the refrigerator as the flavors meld. Here’s how to store it:
- Refrigerator: Cover and store for up to 5 days. The texture is best within the first 3 days.
- Freezer: Wrap individual slices or the whole cheesecake (without toppings) tightly in plastic wrap, then aluminum foil. Freeze for up to 3 months. Thaw overnight in the refrigerator before adding fresh toppings.
Troubleshooting Your Cheesecake
Even experienced bakers hit snags sometimes. Here are solutions to common no bake Oreo cheesecake challenges:
Filling Won’t Set Properly
- Problem: Your cheesecake is still too soft after chilling.
- Solution: Make sure you’re using full-fat cream cheese and whipping your cream to stiff peaks. The filling needs that structure! If it’s still too soft, pop it in the freezer for 30-60 minutes before serving.
Crust Crumbles When Slicing
- Problem: The crust falls apart when you cut slices.
- Solution: Add an extra tablespoon of melted butter to your crust mixture next time, and pack it more firmly into the pan. Chilling the crust thoroughly before adding filling also helps.
Lumpy Filling
- Problem: You notice lumps in your cheesecake filling.
- Solution: Always use room temperature cream cheese (leave it out for at least 2 hours), and beat it thoroughly before adding other ingredients. Cold cream cheese will always create lumps!
Delicious Variations to Try
Once you’ve mastered the classic no bake Oreo cheesecake, try these tasty variations:
Mint Chocolate Oreo Cheesecake
Swap regular Oreos for Mint Oreos and add 1/4 teaspoon peppermint extract to the filling for a refreshing twist.
Peanut Butter Oreo Dream
Add 1/2 cup smooth peanut butter to the filling and use Peanut Butter Oreos for the crust. Drizzle with melted peanut butter before serving.
Birthday Cake Oreo Explosion
Use Birthday Cake Oreos and fold in 1/4 cup rainbow sprinkles for a festive celebration cheesecake.
Mini No Bake Oreo Cheesecakes
Line a muffin tin with paper liners and prepare the recipe as directed, dividing the crust and filling among 12 cups. Perfect for portion control and gatherings!
Frequently Asked Questions
Can I use low-fat cream cheese for no bake Oreo cheesecake?
While you can, I don’t recommend it. Full-fat cream cheese provides the richness and structure needed for the perfect set. Low-fat versions contain more water and can make your cheesecake too soft.
Why didn’t my filling set properly?
The most common culprits are under-whipped cream or cream cheese that was too warm when mixing. Make sure your cream reaches stiff peaks and that you’re using cold heavy cream straight from the refrigerator.
Can I make this cheesecake ahead of time?
Absolutely! This is actually the perfect make-ahead dessert. Prepare it up to 2 days in advance and add the toppings just before serving.
Do I need to remove the cream filling from the Oreos for the crust?
Nope! Use the whole cookie, cream and all. The filling adds sweetness and helps bind the crust together.
Can I use a regular pie plate instead of a springform pan?
Yes, but you’ll lose the dramatic presentation of the tall, freestanding cheesecake. If using a pie plate, I recommend making just the crust on the bottom (not up the sides) and reducing the filling by about 1/4.
How do I get clean slices when cutting?
Dip a sharp knife in hot water, wipe it dry, then make your cut. Repeat this process for each slice. The heat helps the knife glide through the cheesecake without dragging.
Final Thoughts on No Bake Oreo Cheesecake
This no bake Oreo cheesecake has been my secret weapon for years when I need a dessert that makes people think I spent hours in the kitchen. The contrast between the creamy filling and the crunchy cookies creates a texture experience that’s simply irresistible.
What I love most about this recipe is how versatile it is—perfect for summer gatherings when you don’t want to heat up the kitchen, ideal for make-ahead dinner parties, and adaptable to countless flavor variations.
Have you tried making this no bake Oreo cheesecake? I’d love to hear about your experience in the comments below! Did you try any of the variations, or come up with your own creative twist? Share your photos and tag me on social media—seeing your creations brings me genuine joy!
Until next time, happy no-baking!
Hungry for more? Check out our top rated recipes :