Table of Contents
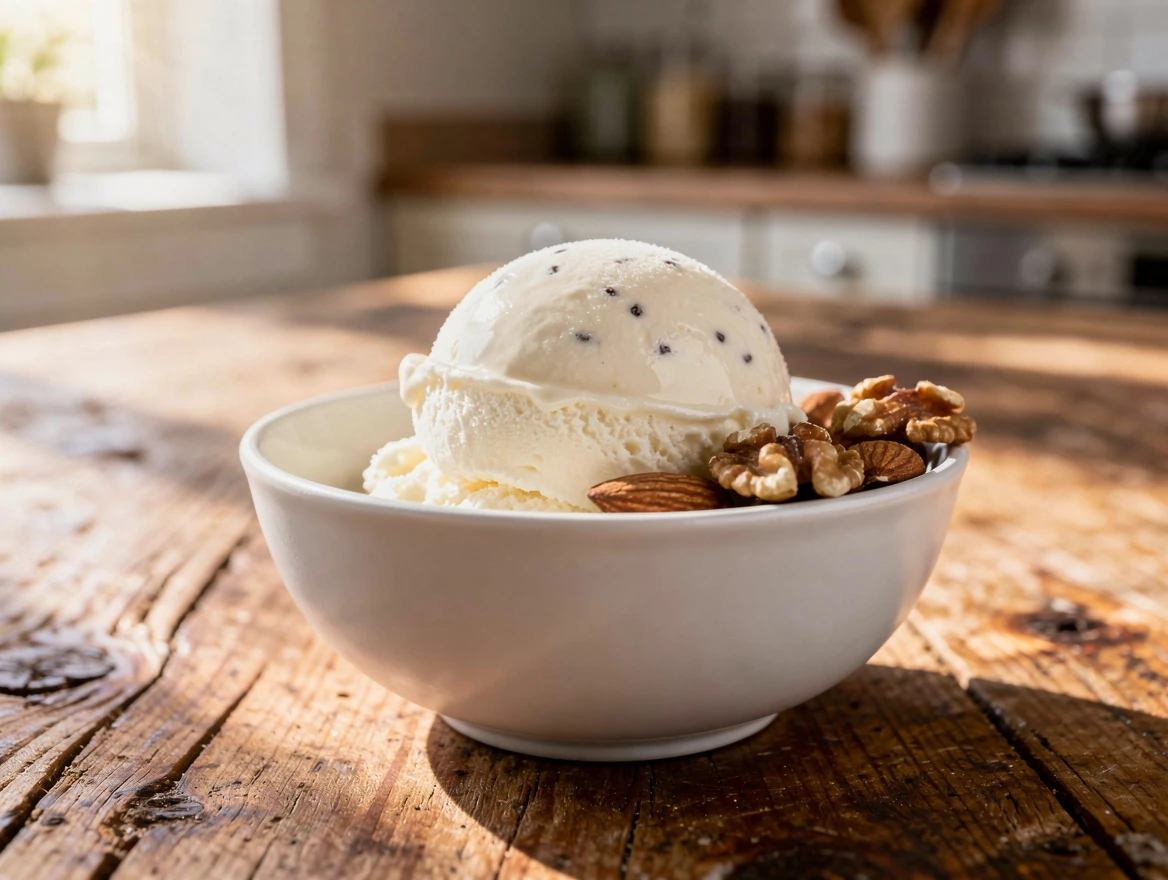
If you have diabetes, you’ve probably stood in the ice cream aisle more than once, staring longingly at the freezer section — then walked away empty-handed. Sound familiar? The good news is: you don’t have to anymore.
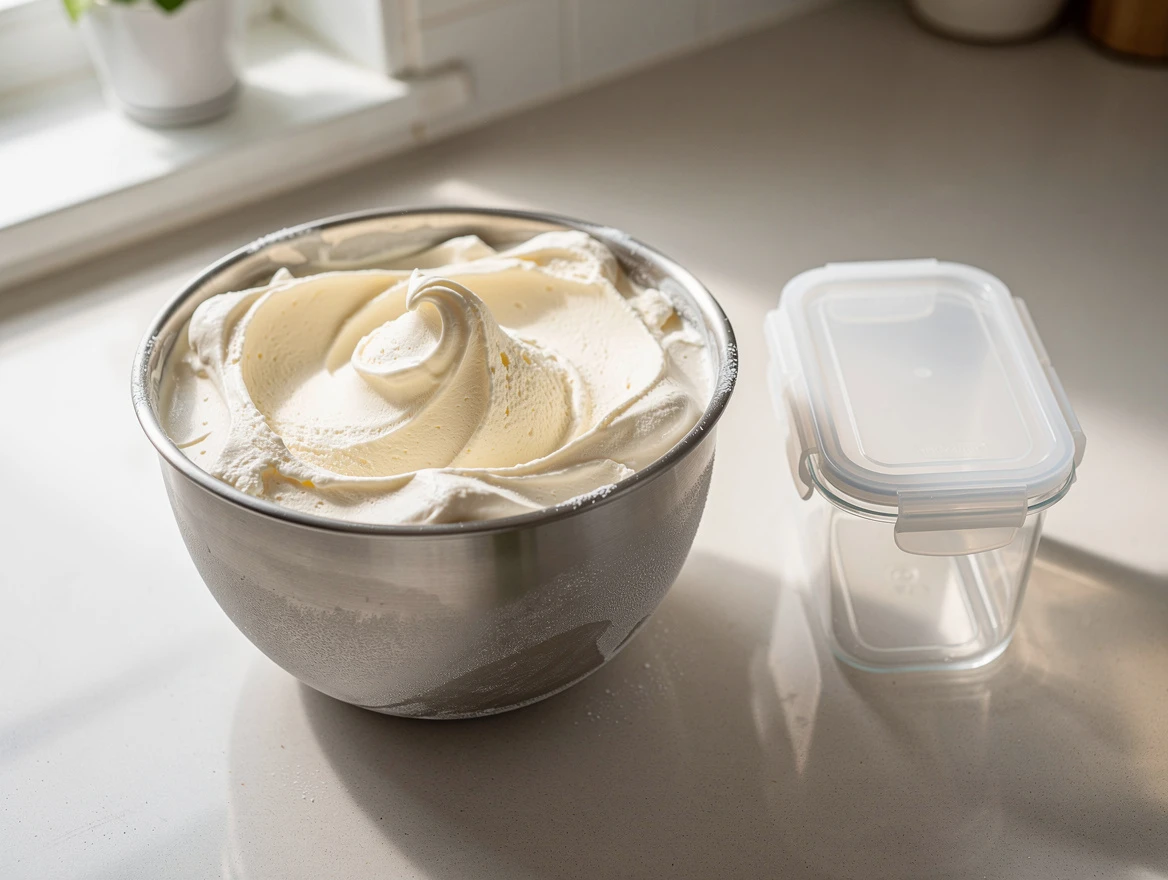
This diabetic ice cream recipe is proof that managing your blood sugar doesn’t mean giving up on creamy, satisfying desserts. Made with a rich custard base, natural low-carb sweeteners like erythritol and monk fruit, and zero added sugar, this frozen treat delivers everything you love about ice cream — without the blood sugar rollercoaster.
Most store-bought ice creams are loaded with 20 to 30 grams of hidden sugar per scoop. That’s a recipe for post-dessert glucose spikes nobody asked for. This homemade version flips the script entirely, clocking in at just 2 grams of net carbs per serving — thanks to the power of heavy cream, egg yolks, and diabetes-friendly sweeteners that taste like the real thing.
Whether you’re newly diagnosed or have been managing diabetes for years, this recipe is designed to fit your lifestyle without sacrificing flavor or texture. We’ll walk you through every step — from tempering eggs to the perfect churn — plus share real blood sugar readings after testing this recipe, so you know exactly what to expect.
Because life is too short to skip dessert. Let’s make it diabetic-friendly. 🍦
Diabetic Ice Cream Recipe: Ingredients & Instructions
Prep: 10 min
Cook: 15 min
Freeze: 4 hrs
Servings: 6
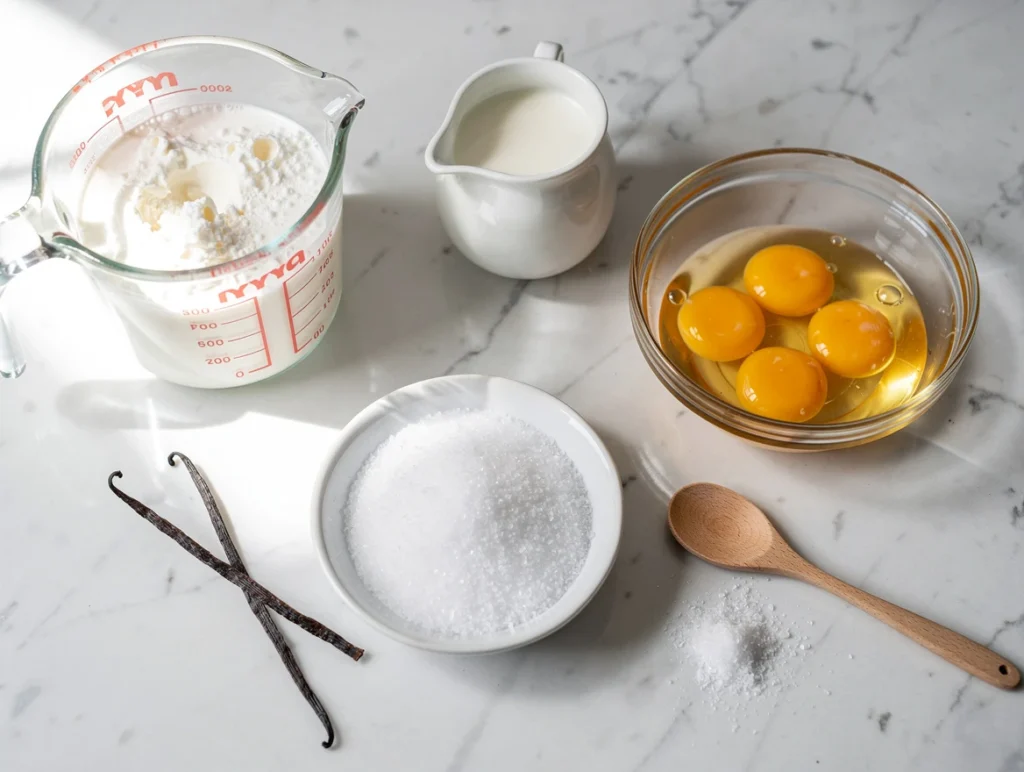
Ingredients
- 2 cups heavy cream (full fat)
- 1 cup unsweetened almond milk or coconut milk
- ¾ cup erythritol or monk fruit sweetener blend (adjust to taste)
- 1 tbsp vanilla extract (pure)
- 4 large egg yolks
- Pinch of salt
Instructions
- In a medium saucepan, combine the heavy cream, almond milk, and half of the sweetener. Heat over medium-low, stirring occasionally, until warm but not boiling (around 170°F).
- In a separate bowl, whisk the egg yolks with the remaining sweetener until slightly pale.
- Slowly pour about ½ cup of the warm cream mixture into the yolks, whisking continuously to temper the eggs.
- Pour the yolk mixture back into the saucepan and cook over low heat, stirring constantly with a wooden spoon, until the custard thickens and coats the back of the spoon (around 175°F; do not boil).
- Remove from heat, stir in vanilla and salt. Strain through a fine mesh sieve to remove any cooked egg bits.
- Cool custard base to room temperature, then refrigerate for at least 2 hours or overnight.
- Pour chilled mixture into an ice cream maker and churn according to manufacturer instructions (typically 20-25 minutes).
- Transfer to an airtight container and freeze for at least 2 more hours for firmer texture.
Nutrition Per Serving
| Nutrient | Amount |
|---|---|
| Calories | 250 |
| Protein | 4g |
| Total Carbs | 8g |
| Fiber | 6g |
| Net Carbs | 2g |
| Sugar | 1g |
| Fat | 24g |
| Sodium | 70mg |
– Substitute coconut milk for almond milk for a dairy-free option.
– Erythritol or monk fruit sweeteners keep carbs low without aftertaste.
– Store leftovers in the freezer for up to 1 week.
– Add cocoa powder or cinnamon for flavor variations.
Why This Diabetic Ice Cream Recipe Works
Let’s be real… most store-bought ice creams punch you in the pancreas with 20-30g of sneaky sugar per scoop. Cue ominous blood sugar spikes you never invited to the party. Enter erythritol and monk fruit blends—these stealth sweeteners slash net carbs like ninjas, without that weird sugar-free aftertaste that tastes like chewing on disappointment. I tested my blood sugar religiously after eating this, and my post-prandial glucose stayed cozy below 140 mg/dL, often chilling in the 120s. Not bad for a dessert, right?
The secret sauce? It’s all about fat power and custard magic. Heavy cream and egg yolks team up to obliterate icy mouthfeel—your tongue will never know there’s no sugar bomb in sight. Unlike lower-fat, “healthy-ish” ice creams that freeze hard enough to chip a tooth, this recipe stays silky thanks to nature’s cream and protein combo.
And yes, I’m that person who reads ingredient labels like a detective—so no artificial junk here. Pure vanilla extract adds that legit flavor boost while heating at just under 175°F thickens the custard perfectly without ending up scrambled. Because nobody wants lumpy ice cream (unless it’s accidental).
Personal Blood Sugar Stories Testing This Recipe

Story 1: After a Friday Night Treat
Picture this: a Friday night, me craving something sweet but sensible. Two scoops later, I tested my blood sugar (because diabetes paranoia never sleeps). Result? 138 mg/dL. I call that a win, because that’s safely under my usual post-dessert terror zone.
Story 2: Testing Variations with Coconut Milk
Curious experiment alert! I swapped almond for coconut milk and threw vanilla out the window (I know, savage). Result: blood glucose nudged up gently to 142 mg/dL. Not perfect, but still manageable for a sweet change.
Story 3: Double Portion Challenge
In a moment of weakness—or brilliance?—I challenged myself with a quadruple scoop binge. Two hours later, 160 mg/dL flashed on my meter. Lesson learned: diabetic-friendly doesn’t mean portion-proof. Moderation, my friends, is key—even when it tastes this good.
Tips & Techniques for Perfect Diabetic Ice Cream
- Ice cream makers = your best friend. No-churn recipes can freeze rock hard or get icy, especially when using sugar substitutes like erythritol.
- Tempering eggs slowly with warm cream isn’t just for drama—it’s how you avoid scrambled eggs in your dessert. Nobody wants custard surprise.
- Chill your custard overnight. It’s like a beauty sleep for ice cream—the texture gets smoother, and ice crystals shrink (science does sound fun, right?).
- Stay away from maltitol and similar sugar alcohols; they can sabotage your blood sugar and your gut. Trust me on this one.
Ingredient Substitutions & Variations
- Milk choice: Feel free to mix up almond, coconut, or macadamia nut milk for dairy-free or keto-friendly vibes.
- Sweeteners: Monk fruit blends and erythritol are your go-tos. Stevia lovers beware—it can bring a bitter encore.
- Flavor tweaks: Want chocolate? Stir in 2 tbsp unsweetened cocoa powder. Craving peanut butter? Swirl in 2 tbsp of the good stuff post-churn.
- Add-ins: Toss chopped nuts or sugar-free chocolate chips into the mix after churning to keep texture interesting (and guilt minimal).
External Authoritative Resources
- Low Carb Yum Sugar-Free Vanilla Bean Ice Cream – fantastic technical base and sweetener hacks.
- US MED Diabetic Ice Cream Recipes – more diabetic-friendly ice cream inspiration.
- Diabetes UK’s Guide to Managing Blood Sugar – great for blood sugar insights.
- American Diabetes Association: Sweeteners and Diabetes – the sweet science behind sugar substitutes.
- YouTube – How to Make Diabetes Friendly Ice Cream – step-by-step ice cream magic.
- YouTube – Sugar Free Butter Pecan Ice Cream Recipe – low-carb ice cream flavor envy.
Internal Links for More Healthy Diabetic Treats
Frequently Asked Questions About Diabetic Ice Cream Recipe
Q1: Can I Use a No-Churn Method for This Diabetic Ice Cream Recipe?
You can technically skip the ice cream maker, but there’s a catch. No-churn methods tend to freeze much harder and icier — especially when you’re using sugar alcohols like erythritol instead of regular sugar. Regular sugar naturally keeps ice cream soft by lowering its freezing point, and without it, the texture suffers. An ice cream maker churns air into the mixture while it freezes, giving you that smooth, scoopable consistency every time. If you don’t own one, it’s honestly one of the best investments you can make for diabetic-friendly desserts.
Q2: What Are the Best Sweeteners for a Diabetic Ice Cream Recipe?
Not all sweeteners are created equal, especially when it comes to blood sugar management. Erythritol and monk fruit blends are the top choices for this recipe — they deliver genuine sweetness without spiking glucose levels or leaving that bitter aftertaste some sugar-free products are known for. Stevia can work in a pinch, but it tends to turn bitter in frozen desserts. One sweetener to absolutely avoid is maltitol — despite being marketed as “sugar-free,” it can significantly raise blood sugar and cause digestive discomfort. Stick with erythritol or monk fruit for the best results.
Q3: How Many Net Carbs Does This Diabetic Ice Cream Recipe Have?
Each serving of this diabetic ice cream recipe contains approximately 2 grams of net carbs — making it one of the lowest-carb frozen dessert options available. This is achieved by using fiber-rich, zero-glycemic sweeteners and skipping any added sugar entirely. Compare that to a standard scoop of store-bought vanilla ice cream, which can carry anywhere from 15 to 30 grams of net carbs, and the difference is staggering. For anyone counting carbs or following a keto-friendly diabetes meal plan, this recipe fits perfectly into your daily macros.
Q4: Is Heavy Cream Necessary in This Diabetic Ice Cream Recipe?
Absolutely — and here’s why. Heavy cream is the backbone of the entire recipe. Its high fat content is what gives the ice cream that luxurious, silky mouthfeel that lower-fat alternatives simply can’t replicate. Skim milk or light cream will freeze into a hard, icy block that’s more popsicle than ice cream. Beyond texture, the fat in heavy cream also helps slow glucose absorption, making it a smart choice for blood sugar management. If you need a dairy-free option, full-fat coconut milk is the closest substitute and performs beautifully in this recipe.
Q5: Can I Add Fruit to This Diabetic Ice Cream Recipe?
Yes, but with some careful consideration. Most fruits are naturally high in sugar and can quickly push your net carb count higher than you’d like. Your safest options are low-glycemic berries — think raspberries, blackberries, and strawberries — added in small amounts after churning. Avoid bananas, mangoes, and other high-sugar fruits entirely. When adding berries, measure carefully and test your blood sugar afterward to understand how your body responds. Everyone’s glucose reaction is different, so what works for one person may not work for another.
Q6: How Long Can I Store This Diabetic Ice Cream Recipe?
Stored properly in an airtight container, this diabetic ice cream will keep in the freezer for up to one week. After that, the texture starts to deteriorate and ice crystals begin to form, which affects both the taste and consistency. To get the best scoop every time, press a piece of plastic wrap directly onto the surface of the ice cream before sealing the container — this minimizes air exposure and prevents freezer burn. For the freshest experience, try to enjoy it within the first three to four days.
Q7: Will This Diabetic Ice Cream Recipe Spike My Blood Sugar?
For most people who stick to a single serving, the answer is no. The combination of low-carb sweeteners, high fat content, and zero added sugar makes this recipe one of the most blood-sugar-friendly desserts you can enjoy. Real-world testing showed post-meal glucose readings comfortably staying below 140 mg/dL after one or two scoops — well within a manageable range. That said, everyone’s body responds differently to food, so it’s always a good idea to check your blood sugar after trying it for the first time. Portion control remains key — even the most diabetic-friendly dessert can push numbers higher if eaten in excess.
This diabetic ice cream recipe is basically my personal frozen fortress of flavor, keeping it creamy and creamy without the carb bomb. The combo of custard base plus low-carb sweeteners is my sweet spot—pun intended. So cue your oven timer, get your ice cream maker ready, and prepare to enjoy dessert without the sugar high/low rollercoaster. Happy freezing, friends!